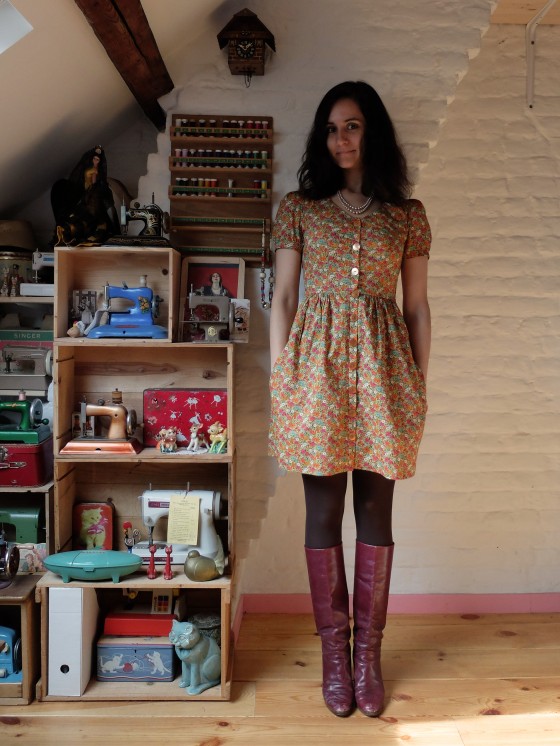
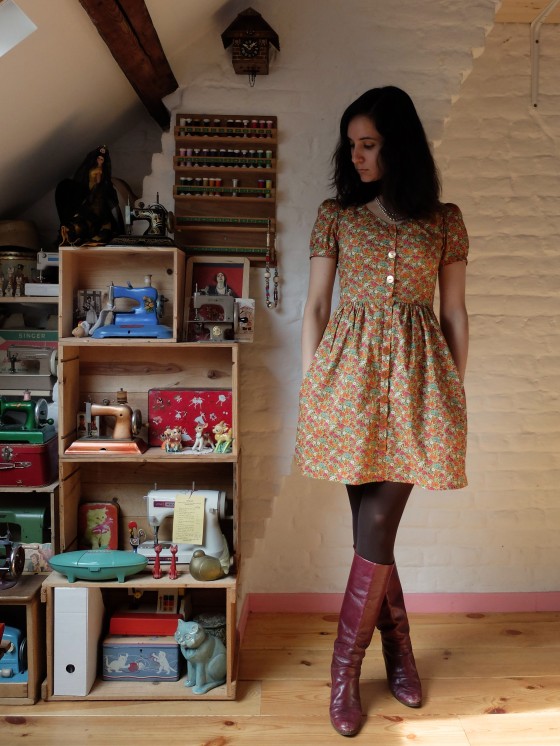
 It’s been a long time coming, but here it is at last; my first Liberty dress!
When Mimolette went to London, she was kind enough to take my order and bring me back two pieces of Liberty from Shaukat: 1,50m of this orange Fitzgerald and 1,50m of purple Ros. I had never sewn with Liberty before and was pretty curious to see what the hype was all about. I still can’t really get behind the price, but it’s true that it’s by far the softest and nicest cotton to work with I’ve ever used. The only downside is that it’s quite transparent. Not too much for a blouse, but I might have to wear a half slip with this dress.
 The fabric was a dream to work with and it was my second time sewing this pattern (the Sureau dress by Deer&Doe), so why did it take me so much time to finish? Well, the first thing is, I made a couple of modifications: I changed the sleeves of the Sureau for those of the Bleuet, which was actually not complicated at all, and above all I changed the fake button placket into a functional one that buttons all the way down.
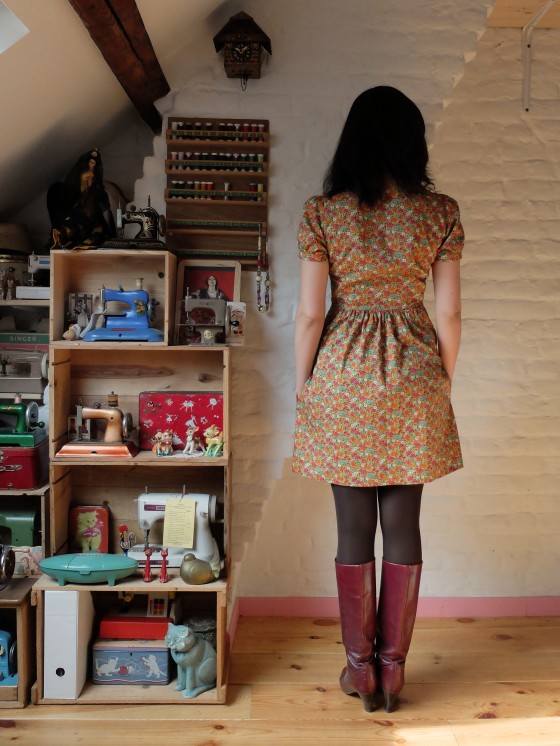
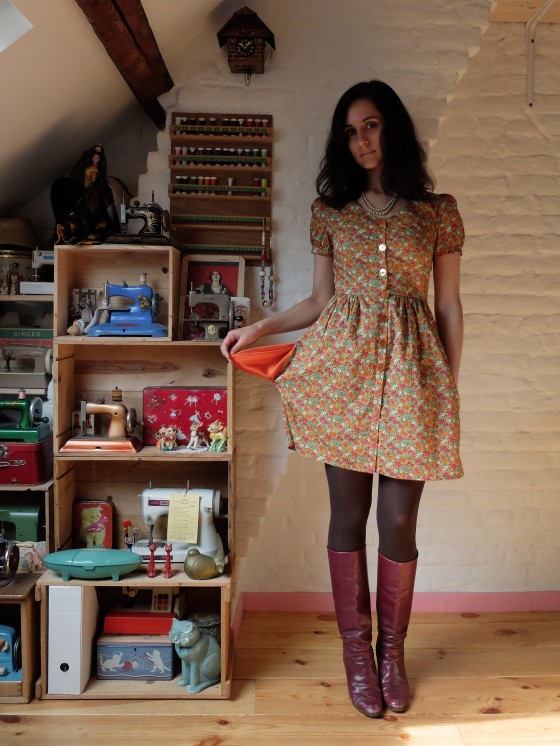
Also, I added side-seam pockets, and after completing them I realised they were lower than I had anticipated. And of course I had French seamed everything (yes, you can French seam side-seam pockets!) so there was no way I was going to undo that. Being the drama queen that I am, I decided if the dress was not going to be perfect, there was no point in finishing it.
 So it hung on a hanger for a while, until I realised it was not that big a deal and the dress would still be perfectly wearable, especially since, even though aesthetically they seemed a bit low the pockets were actually at the right place for me to put my hands in them. And now that I look at the pictures, they don’t even seem too low to me anymore. How to make a mountain out of a molehill.
 Then my iron died on me. It began overheating (to the point of literally melting a few centimetres of the serger thread in this dress – luckily at a sleeve hem, where there was also some normal thread holding everything together) then it simply stopped working… and broke water on a pair of trousers! Like, all the water from the container suddenly started leaking through the sole holes. I had to buy a new one, which I didn’t want to do in a hurry and take the first Made in China crap I found, so once again my Liberty dress hung unattended for a while, only missing a hem, and ten buttons and buttonholes (it’s funny how I had no idea how many buttons this dress was going to need when I made my sketch, yet I drew ten!).
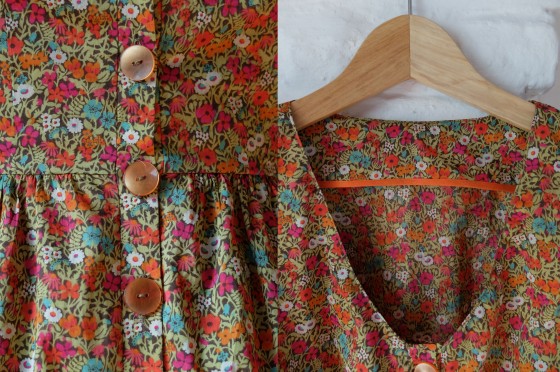
 But I found the iron of my dreams (and of my wallet’s nightmares!) and I was finally able to finish the dress, albeit not without another couple of concerns: first I had to add a tiny press stud between two pairs of buttons (bust and waist) to avoid gaping (worked like a charm!). Then, when I first tried the finished dress on, I realised the neckline, which I had staystitched and understitched, had apparently stretched out despite my precautions: the neckline, which fit perfectly right in my first version of the dress, was gaping like crazy and the facing was trying to escape, the horror!
 I topstitched the neckline, which cured part of the problem (the right side of the neckline now looked perfect), but the left side was still gaping too much to my taste. I was kind of devastated, then I had the idea of stitching a line of gathering thread on top of the topstitching of the left side and simply gathering (and then pressing into submission) the excess fabric. You can imagine my delight when I tried the dress on again and saw that the neckline finally fit! Now, I must say that, with a solid fabric, this little trick would probably have been much more conspicuous, but with such a busy print, I don’t think anyone’s going to notice anything!
 I’m in love with the finished dress, which is pretty much exactly how I envisioned it, and I feel like it’s going to get at least as much wear as my first Sureau! And I haven’t really considered the colour orange these past few years, but this Liberty print really makes me long for an orange sweater or cardigan to go with the dress…
 I bought this small piece of Liberty tana lawn (Garden Wonderland) a few months ago with the intention of making a blouse out of it. Then I changed my mind and decided to make a gathered skirt with a back elasticated waistband instead. I made a mess out of said gathered skirt (don’t ask!), and all I was left with were the front and back panels of the skirt, which luckily were juuuust enough for a blouse, so back to square one.
 I decided to try the Deer&Doe Airelle blouse (if you clicked through those links: doesn’t one of the models look familiar? 😀 ) with the sleeve caps of the Réglisse dress, because that was all I could squeeze out of my skirt panels. I had to shorten the Réglisse sleeve caps for them to correspond to the armholes of the blouse, but style wise I think they suit the blouse very well.
 I made a straight size 36, which fits pretty well I’d say. Had I cut the normal Airelle sleeves, I would have graded the shoulders up to a 38, but the sleeve caps allowed me to forgo that step.
 It was a straightforward sew that didn’t take me more than two days from tracing the pattern to finishing the blouse, and God knows I’m a slow sewer! I finished the seams with my serger, which I’ve come to value more and more: it’s fast and easy, yet looks so professional.
 My favourite part of the blouse has to be the collar: I can’t even begin to understand why so many people have sewn collarless Airelles, but different strokes for different folks… I appreciate the darts, too, which give such a flattering fit through the bodice.
 It’s a nice little blouse that can be worn in a lot of different outfits. I have been wearing it both tucked in high-waisted skirts and untucked over jeans and, although I’m more used to my high-waisted skirts and think those kind of outfits are more my style, I couldn’t really tell which way I prefer it. By the way, those are Ginger jeans you see in some of the pictures, but more about them in a future blog post!


