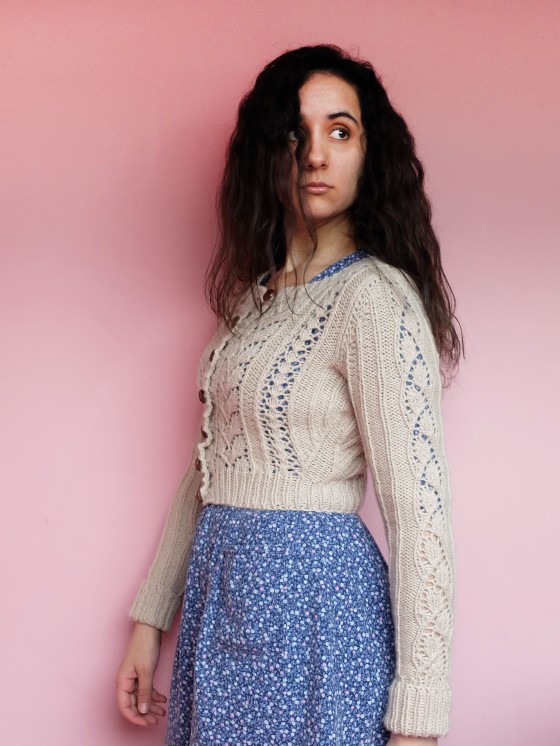
 This is technically my first completed knit of 2016! I started it last August and finished the knitting part at the very beginning of November… but then I waited for two months and a half to weave in the ends and sew on the buttons, no idea why! When I finally got to it, it was nice spending an hour or two on the finishing touches and getting the impression of having made a whole cardigan in so little time!
 This Agatha cardigan is my seventh Andi Satterlund sweater/cardigan, and my third time using Drops Nepal yarn (a wool and alpaca blend). What can I say, I’m a creature of habit! I have nothing new to say about the yarn, it’s still very pleasant to work with and to wear, and its only negatives would be that it sheds a little bit of hair on any dark clothes I wear with it, and that it has a strong smell when it’s wet.
 As for the pattern, it uses the same construction as all of Andi’s sweater patterns, but I would rate it as a little bit more difficult than the other ones I have knit. With the different lace panels of the body that don’t have the same number of rows in their respective repeats, it took me a long time to memorize the repeats and I constantly had to refer to the diagrams, save for at the very end. So nothing complicated per se, but it did require more concentration than the other ones I’ve made, and I am kind of in awe of the people who chose this pattern as their first sweater!
 There are two little things I’m not in love with on the finished cardigan: the first one is the fact that the upper sleeves are a touch too wide for me, even though I made my usual size (Ravelry notes here). When I look back at the pictures of the pattern, I see that’s how they are supposed to fit, and it’s probably just that I’m used to a closer fit, so nothing serious there.
The other small negative is entirely on my part: I don’t know how I managed that, but I messed up the top buttonhole, which ended up way too close to the edge of the button band! I realised that when sewing on the buttons, so I attached the top button accordingly at first, but then I realised I mostly (more like, always) wear my cardigans open, so it made more sense to sew the button on the same line as the other ones, and have it look crooked when the cardigan is closed (i.e. possibly never) rather than when it is open. Plus, I can also wear it with all buttons closed but the top one like I did in some of the pictures here. Come to think of it, the top buttonhole is on the part I knit last, so if it still bothers me after wearing the cardigan for a little while, I could always reknit it… Though I doubt it will be the case!
 Speaking of buttons, they are one of the things I like most about this cardigan! For once I found what I wanted in my stash: they are a series of six buttons that my mother had rescued from an old jacket she threw away years (decades?) ago, and I love their vintage style; I think they pair extremely well with the natural colour of the yarn and the style of the cardigan.
 Another thing I love is the look of the side and sleeve decreases, so neat! And the lace panels, both on the body and on the sleeves. And the cuffs. And… Okay, I think it’s fair to say I quite like this cardigan!


