The Last Summer Dress

Centaurée1According to my Instagram, I started sewing this Centaurée dress at the beginning of July, and I finished it two weeks ago. Two months from start to finish, wow… It didn’t help that I spent three weeks away from my sewing machine of course, but still; I couldn’t bear seeing it hang unfinished in my sewing space anymore! At least it was still summer when I finished it, so I was able to wear it once before storing it away!

Centaurée2What took me so long, you ask? Well, I had this great idea in my head of gold piping between the geometric panels. Which means I had to line the bodice. And shell fabric plus lining plus very thick piping equals way too many layers at the side seams for the zipper to lay smoothly. I tried inserting that zipper about five times; I even tried hand-picking it to get more control, but to no avail. I thought I had to either make do with a horribly shoddy zipper, or say goodbye to my gold piping dreams.

Centaurée4Then it occurred to me, I could sew the side seam shut and insert an exposed zipper at the back instead! I found this white zipper with gold teeth in Paris. I thought it was going to look perfect on the dress, but back home I realised it was a separating zip. I could have kicked myself! I looked for a replacement here in Brussels, but apparently metal teeth zippers are all separating?

Anyway, once again I had to think of a plan B, which was to cut off the bottom of the zipper, cover it with a piece of the gold bias tape I had used for the piping, and call that a design feature…

Centaurée5There was no way I was not finishing that dress after all the time I had spent sewing the bodice panels! And the piping, oh my! Not even the execrable fabric could stop me from soldiering on. When I bought it it was advertised as 100% cotton, but the last time I went to that place they had changed the sign to cotton/poly blend. You know how they say that blends take the best of each fibre? This one took the worst: it wrinkles like cotton, but it presses (more like, doesn’t press) like polyester.

Centaurée3After all the problems I had during the making of this dress, it took me a few days before I could tell whether I liked the result or not. It’s not perfect, but I love its shape, which I find very flattering (at least from the front. As you can see in the picture above, there’s a small risk of looking pregnant from the side, ah well!) and all the little details I added such as the flat piping, the gold topstitching and the patch pockets!

Centaurée6

Dahlia Top

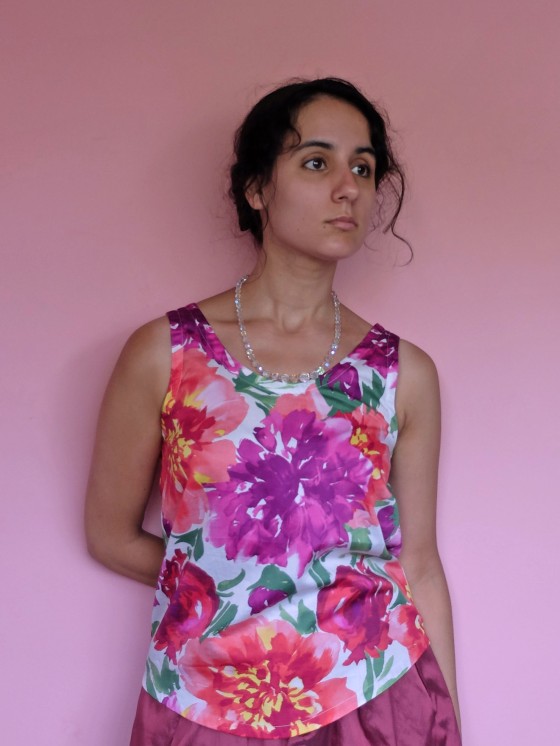
Eucalypt6I sewed something – I repeat – I SEWED SOMETHING!!!

So I started this Eucalypt tank ages ago, in June to be precise, just before I sewed this dress. But my poor choice of bias tape had me think I had ruined everything and the tank was not worth finishing.

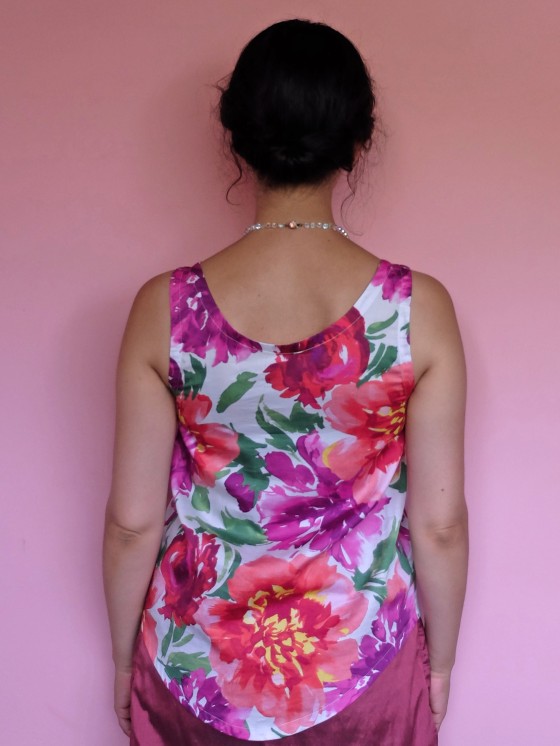
Eucalypt1I don’t know the composition of the fabric (I got it at a fabric swap), but I’m pretty sure it’s a natural fibre seeing how nicely it presses and how soft it feels against the skin. And what I’m absolutely sure of is that it’s very lightweight, so I shouldn’t have used that awful stiff store-bought bias tape to finish the armholes and neckline, what was I thinking?!

Eucalypt2The neckline especially was looking as if it was trying to escape as far away from my body as possible, ugh! I tried to arrange things as much as I could by pressing the heck out of that neckline tape, but I was not convinced by the result, so I hung the unfinished tank on a hanger and proceeded to give it the side eye every time I passed it in the next three months.

But last weekend, desperate to sew but feeling hampered by the unusual number of UFOs hanging in my sewing space, I thought I should finish this tank (it was only missing its bottom hem) and, worse comes to worst, wear it as a pyjama top.

Eucalypt3I didn’t bother finding/making lightweight bias tape for the hem (ruined for ruined…) and used the same stiff bias tape I had used for the neckline, only in a different colour because I had no more white bias tape in my stash and I didn’t feel like going out and buying some more. So the hem tape is lilac while the rest of the bias tape is white, so what?

Eucalypt5Not only is the stiff bias tape much less of a problem at the hem than at the neckline, but I also pressed the neckline again (and again!) and finally got a decent result! It’s still far from perfect of course, but it’s now inconspicuous enough that you don’t notice there’s anything wrong with the neckline unless looking for it specifically.

Eucalypt4The armholes are still gaping a little, depending on the way I’m holding my arms (see the first picture of this article), but once again, I don’t know who’s going to notice that when I’m wearing the top. So I’m definitely glad I finished it; it would have been a shame wasting that beautiful piece of fabric, even if I got it for free!

And I can see a lot of Eucalypt tanks in my future! If not for my stupid mistake, it was a very nice pattern to work with. It’s simple but not simplistic and it could look smashingly different depending on what fabric you use or what detail you add.

Adelfa Cardigan

Adelfa1Three knitted projects in a row, not a single sewn project in between. What can I say? Three weeks in Spain, far from my sewing machine, followed by the start of school and its unavoidable fatigue… Not the ideal conditions to get back to sewing!

Ah well, at least my beloved knitting needles can go everywhere with me and one row here, one row there, I ended up with a new cardigan!

Adelfa2Most of this cardigan was actually knit in Spain, on a stone bench next to an oleander – adelfa in Spanish. For my last two weeks there I was staying in a village where I didn’t have a lot to do but to knit or read (I’m not complaining here, this is my ideal kind of vacation!), so in those two weeks I finished the body and a sleeve and I knit more than half the second sleeve. Then I came back to Belgium (and to work), and the remaining half sleeve and neckband took me two whole new weeks to knit.

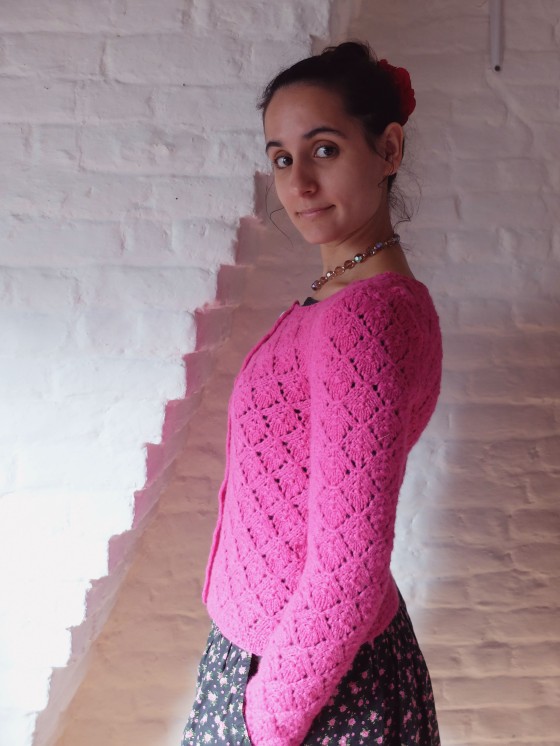
Adelfa4The (free) pattern is Que Sera by Kirsten Kapur and the yarn is Cascade 220, knit with bigger needles to get gauge. I made a few small modifications to the pattern: first, I added three buttonholes to the five of the pattern. I thought they looked a little too far apart in the pictures.

Then I lengthened the sleeves by one pattern repeat (12 rows) and I knit them in the round. I had to adapt the lace pattern a bit for it to work in the round (see my Ravelry notes), but that was really easy. Because of my knitting the sleeves in the round, I was afraid the sleeves would end up too wide for my taste (since there would be no seam allowance to take in account), so I knit them a size smaller than the body. Note that knitting the sleeves in the round also made them much more difficult to block correctly (which is why I’m particularly glad that I lengthened them a touch!). But I was very happy not to have to seam them up afterwards, so there’s that.

Adelfa3Also, when I first tried on the cardigan with the buttons closed, the button bands gaped like you wouldn’t believe. So I had to stabilise them with petersham ribbon. I used a method that is very similar to this one, except that I didn’t interface my petersham and that I took care to make all of my hand stitches virtually invisible because clearly I’m a psychopath. It took me four episodes of Murder, She Wrote (Have I ever told you about my passion for Murder, She Wrote?) to sew on the petersham but come on, look how pretty!Adelfa5So that’s it, I’m delighted with my new cardigan; I love its style and colour (closest to the detail picture of the petersham button bands, by the way) and I’m sure it will look great with a lot of my clothing pieces, existing or to come!

PS I forgot to mention this in my last two posts, but I’m on Instagram now!

Les vacances de Mademoiselle Hulot

Hulot1Monsieur Hulot’s Holiday is one of my favourite movies, and every time I watch it I fall in love again with the costumes (among so many other things!). I had been meaning to knit myself a summer sweater worthy of the holidaymakers of the movie for a few years, so in July, when I was trying to decide on my next knitting project, I settled on a striped cropped sweater that I thought would fulfill this need.

I knew I wanted navy and cream stripes on a cropped sweater with a fitted waist; I also wanted to try Drops Muskat, but I didn’t know what pattern to use. I hadn’t even thought about that option, but Mimolette convinced me that the kind of sweater I wanted would be pretty easy to design myself…

Hulot3And she was right! After all, the effect I was looking for didn’t need a lot of shaping; all it required were two rectangles, one for the front and one for the back, a few increases at the neckline and a lot of decreases at the waist, and that’s it!

I knit this sweater Andi Satterlund style, i.e. seamless and from the top down, knitting the top of the back, picking up the front shoulder stitches and knitting the top of the front then joining front and back and knitting in the round (see Ravelry notes for more details).

Hulot2As for the distribution of the stripes, I made it up as I went along. When I realised I wouldn’t have enough navy yarn to go on with my four navy rows, four cream rows design, I simply started knitting wider cream stripes. I was afraid until the end that I wouldn’t have enough yarn to finish the sweater, but I did (with less than a metre of either yarn left after I cast off)!

This sweater was knit in less than two weeks, so I could take it to Spain with me and I wore it a lot there both with the red Chardon you see in the pictures and my polka dot skirt. And I’ve already worn it here in Belgium, too, in the week I’ve been back!

Hulot4Now if only my last sewing projects could be as successful as my last knitting projects: I couldn’t finish either of the two summer dresses I’d started before my departure (a Centaurée and the Juni dress from this book that was my final choice for the Outfit Along), and I haven’t had enough energy to get back to sewing since my return. Sooo much easier to knit in the couch than to get up and sew!