Doppelgangers

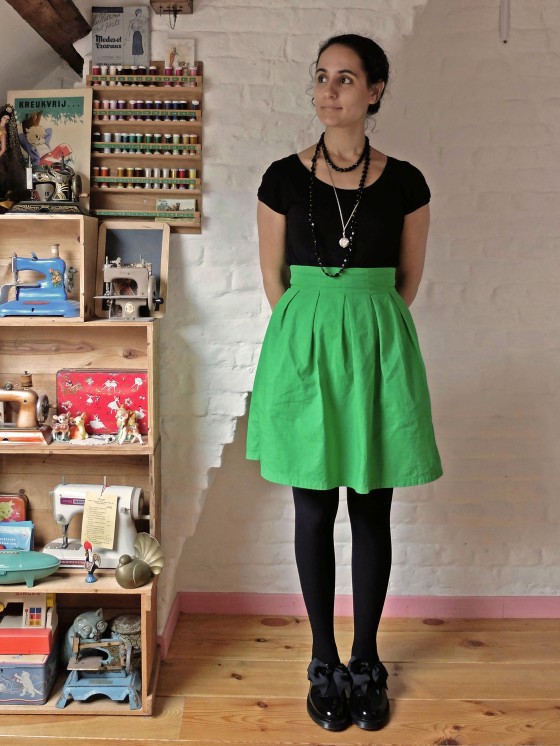
Chardon1The vermilion Chardon skirt I made two years ago is one of those garments I reach for constantly, both in summer and winter. So when I found this vibrant green cotton at Les Tissus du Chien Vert earlier this year, I thought it would make a perfect new glaring Chardon that I knew would get a lot of wear.
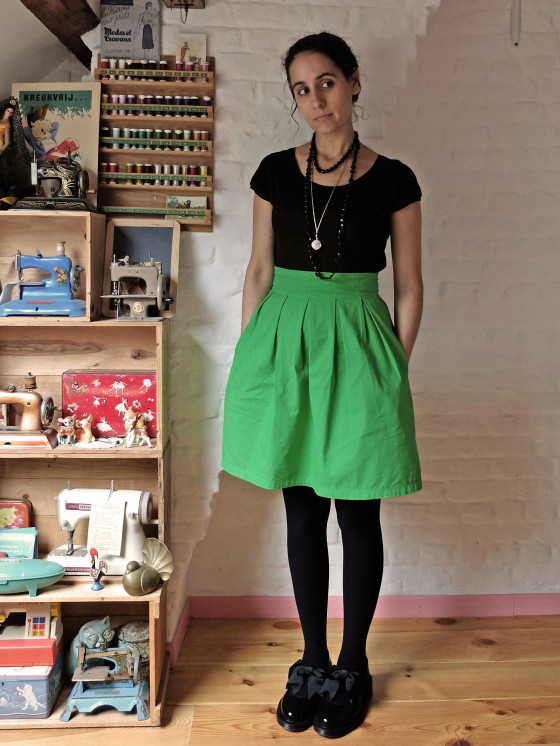
Chardon2I made this skirt in early May, so I can already tell you that it did indeed get a lot of wear, as did the t-shirt I’m wearing in the pictures, sewn a few days before. The t-shirt is also my second time using a pattern (and it’s also the same t-shirt I’m wearing in the pictures of the post about my first Chardon!), a two-piece tee (one front piece, one back piece) from this Ottobre magazine.

Chardon6I finished the t-shirt differently from the first time, by substituting a narrow neckline/sleeve band to the neckline/sleeve binding. Other than that, it’s the same as the first one, but serged instead of sewn by machine (except for the top stitching, made with a double needle). It’s also exactly the same kind of slinky rayon knit as the purple one, but two years of experience made it way easier to cut than the first time around.

As for the skirt, I decided to bind all of the seams with bias tape, and I have to say I was pretty proud of the result! I was afraid it was going to be too bulky at the pockets, but it isn’t, so I’ll definitely use this method again in the future.

Chardon3I did screw up somewhere in sewing the pleats, though, which are a little wider (and less deep) than they should be. At first I made them the correct size, but when I tried on the skirt before attaching the zipper, I felt like it was going to be too snug. So I let out each pleat by a few millimetres to gain a couple centimetres. And of course, when I tried on the skirt a second time, this time with the zipper, it was way too big at the waist! I unpicked the zipper, and since I couldn’t be bothered to unpick and redo the pleats for the second time, I simply cut off the excess at the centre back seam and re-inserted the zipper.

Chardon4Despite this silly mistake, I’ve been wearing these two garments a lot, both together and separately. The outfit I’m wearing in the pictures is the exact outfit I had been wearing all day at work, hence the wrinkled skirt.

I’m really happy with the finishing of both garments, especially of the inside of the skirt. It’s so pretty it almost feels like a waste to keep it hidden. It’s such a shame that I can’t wear it inside out… Or could I?

Chardon5

Sunny!

Sunny1Hello, it’s me again! Once more with two garments for the price of one, which makes a total of five garments in a week, gasp!

It’s been so long since I completed this skirt and top that I don’t even remember which came first… The only thing I remember is finishing them a few days apart and realising how perfect they went together.

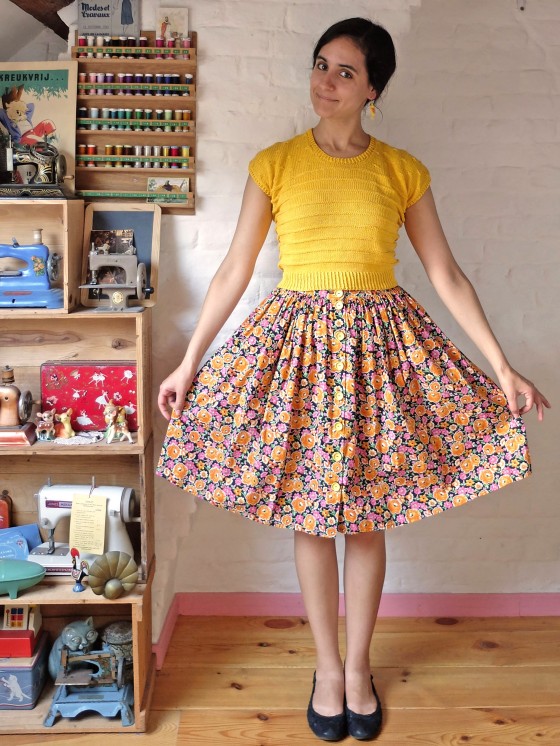
Sunny2The skirt is my second iteration of Tilly’s Picnic Blanket Skirt. I can’t get enough gathered skirts; with or without buttons, I need them all. You wouldn’t believe how many pieces of fabric I have bought with a simple gathered skirt in mind (I think Mimolette is going to club me to death if she ever hears me answering ever again “Oh I don’t know, I was thinking a simple gathered skirt maybe?” to her asking me what I want to make with a fabric I like!).

Sunny3So when looking for something to sew with the remnants of the skirt I sewed for my friend’s birthday (am I the best friend ever or what, sewing her a skirt only two years after her birthday?!), I didn’t dither and went for, well, a gathered skirt. With buttons, because I had spotted these cute ones at Tissus Passion and I was so happy to have found an excuse to buy them.

Sunny6While we’re on the subject of buttons, I got the impression that, after a couple of months of wearing and subsequent washing, they had started to fade a little bit. I compared them with a spare one to be sure I wasn’t seeing things, and indeed, as you can see in the picture above, they are a shade clearer. Fortunately, the fabric (which I bought in Paris about four years ago) seems to stand up better to repeated washing.

Sunny4I like the skirt a lot, but it’s the knitted top I’m most proud of, because it is my own pattern (details on Ravelry)! I had a clear idea of what I wanted it to look like and I made the pattern up as I went. The only radical difference between the finished top and what I had in mind is that I initially intended for the Swiss dot stitch to run on the whole sweater. But when I reached the part where I knit in the round, I realised this stitch couldn’t really be knit in the round. So I had to make a choice between seaming up the top afterwards, or knitting in the round with another stitch. I thought these garter stitch stripes looked cute with the dots, so I chose to go on knitting in the round with this stitch.

Sunny5The yarn is Catania and I loved knitting with it. I did freak out when steam blocking the sweater though: with the heat, the yarn changed in texture and got very stiff and started feeling sort of brittle. Luckily, the change was only temporary and everything got back to normal as soon as the yarn cooled down.

I have worn this skirt and top a lot since I finished them four months ago, together and separately. The skirt is especially versatile: with its colourful flowers on a black background, it lends itself to being worn with or without tights, both in summer and winter appropriate outfits!

A Few More Stripes

Marine1With fall around the corner, I’d better increase the pace of my blog posts if I don’t want to end up photographing my summer makes in the cold season.

So here I am already, a mere two days after my last post, and with two garments instead of one! I didn’t think either of them deserved a post on its own, and I wore them together a lot on holiday, so I decided to photograph and write about them together, too.

Marine2The shorts were sewn first, the day before a five day trip to Italy, when I suddenly realised that I didn’t own a single pair of shorts since I got rid of an old pair at the end of last summer. Even though I’m more of a dress/skirt kind of gal, there are some instances when nothing beats a pair of shorts.

Marine3I leafed through my Burdas, quickly found this pattern that seemed both easy and quick to sew and immediately went to work. I had just bought the fabric, a navy stretch cotton, at Les Coupons de Saint-Pierre a few days earlier during a trip to Paris (yes, I was lucky enough to travel a lot this summer!), so I hadn’t stored it yet, and I thought it would make for a comfortable pair of shorts.

I made a size 40, which corresponds to my hip measurement, and I didn’t bother to make a muslin, so I was pleased to see that the fit was okay. Far from perfect, but okay. They do tend to give me a wedgie during walks (and not only during walks, judging from the back picture!), though, and I guess elasticated waist shorts are never that flattering anyway… Ah, well!

Marine6The pattern was easy and fast to sew. I mean, if I can sew a pattern in a day, it has to be really easy and fast. The only thing I failed to understand was whether the side seams had to be closed or remained open. I thought they were supposed to remain open, but when I tried on the shorts and lifted my leg, the opening gave way much more than a glimpse of my buttock! So I sewed them shut afterwards, and I think it makes the shape of the shorts look nicer from the front, too.

Marine4The tank was also made from a piece of fabric I bought during my Paris trip (this time at Sacrés Coupons). And it was also a fast and easy sew. The pattern is Megan Nielsen’s Eucalypt Tank, which I had sewn previously, but in a woven. I went down a size (I graded the side seams from the smallest size) to accommodate for the stretch of the cotton jersey knit. And when I tried it on, I decided to shave off a few centimetres from the shoulder straps.

Marine5I serged the side and shoulder seams, and simply serged and turned the neckline, armholes and hem, and topstitched with a zigzag stitch.

I don’t see myself wearing the shorts outside of very casual situations, but I love the tank, and I think it can easily be dressed up, especially tucked in a high-waisted skirt.

And no, I don’t think there is such a thing as too many stripes in a wardrobe!

Ma Pomme Dress

MaPomme1I made this dress as a replacement for one of my go-to summer dresses, which was one of the first garments I sewed. The dress in question was actually a vintage dress refashion, so it’s kind of a miracle that the fabric had held up for so long, but I was still sad when I realised I couldn’t wear it anymore.

Then again, I was also glad to have an excuse for sewing myself a new one of course!

MaPomme2I had bought the fabric (100% cotton; the brand is Little Darling) earlier this year at the Stoffenspektakel with this exact dress in mind. It was a delight to sew and is also really nice to wear.

As for the pattern, well, I didn’t use one! I drafted this dress myself, you see… OK, OK, my “pattern” is literally a rectangle! 😀 And two of the sides were in fact the selvedges of the fabric. So the cutting part was not too difficult: I just had to tear a piece of roughly the length of this dress (and a few centimetres more just in case – which I ended up using as you can see on the finished dress)… and that’s it!

Same with the shoulder straps: after I measured the desired length and width of my straps, I simply tore four pieces (not forgetting to add seam allowances), then rounded one of the short edges of each.

MaPomme3What makes the dress is the shirring of course. I used a method similar to this one (after sewing the fabric piece into a tube – with a French seam – and making a casing at the top to insert a piece of elastic afterwards to avoid ruffles) and it was, once again, very easy. But man did it take a long time! Eighteen rows of shirring along 1,50 m of fabric, I was feeling murderous near the end! Then I saw how cute the shirring looked and I relaxed a little bit. 😉

MaPomme4I forgot to take close-up pictures of the pockets, but they are almost the same (just a little bit deeper) as these ones, made following this tutorial. I did take a picture before attaching them to the dress, though. The buttons on the pockets are the same as the buttons on the straps, only smaller. I bought them at Veritas… in Luxembourg (I hadn’t found any I liked here in Brussels and I was spending two days there)! None are functional.

MaPomme5There are two small things I’m not so fond of with this dress. The first one, the fact that it creates a sort of semi muffin top under the arms (front and back), is inherent to this type of garment, at least on my body. And the second one is simply that I didn’t think to interface the shoulder straps and that they are a touch limp as a result. These two details are what stops me from loving this dress as much as I love the previous one I showed you, but I still like it a lot!

See you soon for the rest of my summer sewing projects!

Encina Dress

Encina1How time flies when you’re on holiday… I hadn’t planned on taking a blog break for the whole duration of my summer off from work, but these two months have flown by and I have just realised that I haven’t posted anything here since the end of June.

I have mentioned previously that I don’t like posting my finished makes in the “wrong” order, i.e. not in the order I finished them, but I have finally come to my senses: this would mean photographing my sundresses in the dearth of winter, which… nope, not going to happen!

Encina2So here is the last thing I made, and a clear favourite! I spent the month of August in Spain, and since I had just gotten rid of a few too old summer dresses, I needed to sew one or two new ones to take with me.

This one is a Japanese pattern, dress F1 from this book (how cute is the cover dress by the way?). As you can probably guess from the loose fit and simple design, it didn’t require a muslin and it was really easy and fast to sew. I made a size M (FYI, my bust is a Burda and Deer&Doe 36) and it was spot on; I didn’t need to take anything in or let anything out.

Encina4When I first inserted the back elastic, I thought it looked really weird, thick and lumpy, but I was surprised by how much better it looked on the finished dress, and although not perfect, it doesn’t bother me any when I wear the dress.

Encina5My only deviation from the pattern was adding two giant patch pockets, for aesthetic and practical purposes. At first I sewed them right along the side seams of the dress (as you can see here), but in the end I felt like they would look better placed about ten centimetres closer to the centre, so I unpicked and reattached them.

Encina6The fabric, a pale blue cotton with white trees, came from Stragier. It cost €15 a metre, which is more expensive than what I’m usually willing to pay for a simple cotton, but it seemed so much cheaper compared to the outrageous prices of most of the fabrics in the shop, and anyway, I couldn’t pass up such a lovely print! Because the trees reminded him of the oaks that adorn the country in the area where we spend our annual summer holiday, it was my boyfriend who dubbed the dress my “Encina dress”.

Encina3I’m particularly happy with this dress. It was unbelievably comfortable in the Spanish summer heat, and I also find it really pretty and surprisingly flattering (though I won’t be mad at you if you roll your eyes at my proneness to find potato sacks flattering…).

Next up, another favourite, the other dress I sewed for my Spanish trip!