Magpie Shoe

Magpie1I made a shoe!!! Yes, a shoe, as in one shoe, not two, but hey, I MADE A SHOE! 😀

We’re only doing single shoes for the moment, no pairs yet (that’s for next year!), and this is my second shoe ever! The first one was this ugly burgundy ballet flat (which I will cherish for the rest of my life because, you know, first shoe ever and all that) that I didn’t really get to design: I only followed the instructions of the teacher, not really understanding what was going on and being kind of amazed when I got what looked like a shoe in the end.

Project4This time we had to design the shoe (it had to be a court shoe) ourselves, based on a black and white animal. I chose the magpie, as you can guess, if not from the shoe itself, at least from the title of this article. And look, my shoe even looks like my final drawing! I only omitted the jewel because, can you believe it, I completely forgot about it! The jewel was there because magpies are alledgedly jewellery thieves.

There were a few preliminary drawings before the final one (these are pages from my sketchbook by the way, not Photoshop collages – but I did edit the contrast after scanning them):

Project1

We were advised to first draw what came to our mind in order to get some ideas, so I drew a few models without thinking about it too much, just to see how the magpie could translate as a shoe.

Project2Then I tried to be a little more precise, which is when I got the idea of the black feathers on a white background. I quite liked the design of the shoe at the top, but not its shape. I wanted something that would reflect my style a little more, with a feminine and retro touch.

Project3I was happy with these two drawings, but the teacher found that the top of the shoe was too high. I did not agree at first, but when I drew my design on the shoe last I chose, which allowed me to see how it would look on a foot, I could see how wrong I was! So I made the final drawings, which you saw above, where I lowered the top of the shoe and gave the shoe a more delicate heel.

Magpie2Putting this shoe together was a lot of work. I’m kind of sad I didn’t think to document the different steps, but I will try to do that for a future (pair of) shoe(s). It’s not perfect by any means, and I’m (really!) not fishing for compliments, but I don’t want to focus on the negative details, which are not that obvious when you don’t look at the shoe from too close and are quite normal for a second shoe ever! I just wanted to point out that I’m not under the delusion that my shoe is perfect nor hiding its (many) defects to pretend that they don’t exist.

Magpie3

The other side, with a simpler design because it’s less visible.

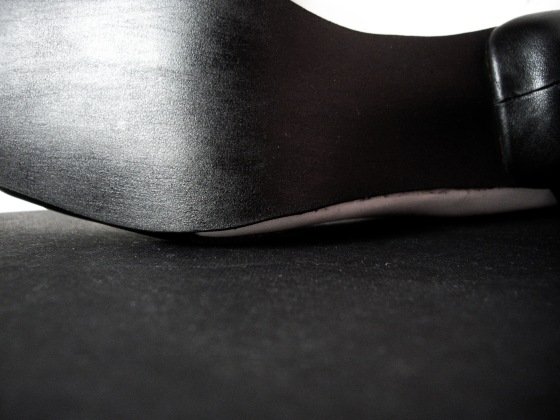
The shoe is made from black and white leather, the inside is lined with thinner black leather. The heel is also covered by leather, the same I used for the lining if I remember correctly, because the other one was too thick, but you really can’t tell the difference. The sole is a thick brown leather, which I had to paint black.

Magpie4The shoe is a size too small for me, so I couldn’t really try it (though I did manage to squeeze my foot into it – not a pretty sight!). The first ballet flat I made was a size too big, so I made sure to chose a last in my size for my third shoe (which I won’t finish before next (school) year, it’s on pause during summer vacation).

The sole, painted black.

I’ll leave you with some detail shots of the shoe. You can see the sole above and the heel and topstitching below. Once again, let me remind you that I spared you from more unsightly close-ups!

Have a nice weekend! I think I’ll spend mine admiring my shoe! 😀

Magpie6

WIP: Short-Sleeved Sweater

EnCoursIt never takes me a long time to begin a new knitting project after I complete one! Thinking of the next project is usually what motivates me to finish the last one, especially when it has been dragging on for too long like my last sweater. This time I finished my sweater on Thursday and casted on the next one (after its gauge swatch, I’m a cautious knitter!) on Friday.

I thought I wouldn’t be able to knit a lot this weekend due to the ginormous pile of exams I had to correct, but I did find some time to devote to knitting during my breaks and in the evening. I actually finished the 100 rows of stockinette at the beginning of the back (note that I was at row 60 when I took the above picture). Here’s hoping I keep the same rhythm and finish this sweater faster than the last one!

I know some people find stockinette boring as hell, but I personally LOVE it! I find it so relaxing and you don’t need too much concentration so you can have a conversation or watch TV without missing anything.

The pattern is from an old(ish) issue of Phildar. As far as the yarn is concerned, the one recommended by the pattern for the main part of the sweater (Phil Milk) has been discontinued for a long time, so I’m using Muse (also by Phildar) instead. For the black collar I’m using Phildar’s Lambswool.

As you can see I’m linking to Ravelry! I’ve had an account since 2010 (!) but I’ve never done anything with it except to download patterns and the like. Yesterday I finally took the time to upload a few past projects and begin to try and understand how everything works. I’m tassaditknits by the way if you want to be my friend. 🙂

April Fools’ Sweater

AprilFool1It‘s finished!!! I can’t believe it took me so long to finish such a simple project: I began knitting this sweater on April 1st, which means it took me almost three months! I usually knit a sweater in one and a half to two months, but with this one, after a great start with the back, the front took me forever to complete, among other because I kept screwing up the part with the eyelet bows and having to frog and reknit it. After that I kind of lost my mojo and had to wait until I reached the second sleeve to find it again. And now it’s too hot to wear a sweater, waaaah!

AprilFool2But I still have a cute new sweater, yay! It’s exactly as I had envisioned, no surprise about the size or whatever, phew! All in all it was fairly easy to knit (the mistakes I kept doing on the bows where due to my lack of attention, that’s all), especially for my first real foray into colorwork (I don’t know whether to call this sweater colorwork – the chart was so easy).

The pattern is #3 in Phildar Magazine N°69:

Pull3As you can see I’ve changed the colours a bit! I liked the original ones, but I wanted my sweater to be as versatile as possible and I don’t think you could wear such colours in many different outfits. So I chose beige and dark blue, even though I already own a sweater in those colours, because I like nautical style a lot and I thought the form of this sweater was different enough from the other one. And who knows, I might even knit a third one someday seeing as I bought way to much yarn for this project and I still have five balls (almost six) of the beige yarn and four of the blue. 😀

AprilFool3How do you invisibly seam up a striped knit? I couldn’t stop the beige yarn I used to sew the sweater from showing a tiny bit in some places on the blue stripes. I hate seaming up knits!

But what I hated doing the most knitting this sweater was the collar band! Phildar always has this crazy idea of having you knit the collar band separately and sewing it to the sweater afterwards (they don’t seem to know circular needles even exist – they NEVER have you use them). I usually ignore that part and pick up the stitches to knit the collar band directly on the sweater. But this time, my circular needle would not cooperate. I don’t know whether that’s because my hands were sweaty from the heat or just because the needle was poor quality, but after hours (yes, hours! – my left forefinger is still a little numb) of suffering and not even managing to complete one row, I finally had to literally cut the cable of the needle to save the sweater and, the horror, resolve to using the dreaded Phildar method.

AprilFool4Look how cute the back is! They don’t show it in the magazine (you only discover it by reading the instructions!) but it was a pleasant surprise. I thought the pretend button placket looked a little sad without any buttons, so I added three.

So, when’s the cold weather coming back so that I can wear my new sweater?

Babydoll Dress

Babydoll1Much better, don’t you think? Let me remind you what it looked like before:

Before1.1

Meh with or without a belt.

Side view: what the FUPA?!

Side view: what the FUPA?!

A friend gave me this house dress years ago, when I didn’t know how to sew yet. I loved the fabric and I had quite a quirky sense of style at the time, so yes, I did intend to wear it as it was. But there was a definite problem with the bottom of the button band that created the most unflattering side view, so I actually never wore it. Luckily, the hoarder that I am never got rid of it and when I learnt to sew, it went straight to the to-be-refashioned pile… where it languished for a few more years.

Babydoll2

With the empire waist belt.

It’s not even that I didn’t know how to transform this dress; I had a pretty clear idea of what I wanted to do, but I simply never got around to it. But hey, I did get to it in the end and I’m really happy with the result, which is exactly what I had in mind!

There are pockets now!

There are pockets now!

Here’s a list of the changes I made:

– I cut the dress under the bust and under the button band and sewed the bottom part of the dress to the top (after unpicking the side seams at the bust to remove the bust darts that were much too low and restitching the side seams without darts).

– I lined the bottom part of the dress (with turquoise Bemberg rayon – oops, forgot to show that in the pictures!) in order for it not to cling to the tights.

– I used the discarded middle part of the dress to make two patch pockets, which I underlined with the same Bemberg rayon lining so that they are more stable.

– I shortened the sleeves to a more flattering length.

– I added six belt loops at the empire waist to hold the belt (or any thin belt as a matter of fact) in place.

– I changed the buttons.

Babydoll4I initially hesitated between leaving the empire waist as is or elasticizing it, and I found adding belt loops was a better solution since it allowed me to wear the dress both ways. And with the way I placed the belt loops, I can also tie the belt at the back, so I have more styling options!

BabydollDetail1I love the new buttons. The old ones were green and silver and much too small, both aesthetically and for the buttonholes. The new ones are the right size, the right colour and shiny as can be!

BabydollDetail2Don’t look at the above picture for too long or you could get a headache (I know I did!). No, I didn’t sew the pocket with the fabric upside down: there are flowers and leaves facing up and others facing down. In any case, I love this fabric! It’s this almost bathing suit like material (I think it’s a polyester knit) but it drapes really well and, although I was afraid it wouldn’t be breathable enough, it is in fact very comfortable to wear.

And I love refashioning! I got a new dress for much less money (I only had to buy four buttons and 50 cm of lining), work and time than if I had started it from scratch! Plus I love seeing the face of the people who compliment me on it when I tell them that it used to be a grandma house dress. 🙂

WIP: Variation on the Marinière

MarinieÌ€reEnCoursHere’s the knitting project I was talking about, the one that has been taking forever. I just checked, I began working on it on April 1st (oooh, that’s nice for a marine themed sweater!). I’ve already knit the back, the front and the first sleeve: only one sleeve to go (minus most of its ribbing as you can see)!

I’m using a different yarn than the one recommended and it seems I didn’t estimate how much I would need very accurately: with less than one sleeve (and the collar, but that’s only a few rows of ribbing) to go, I still have six balls of the beige yarn and four of the blue. How many did I even buy in the first place?!

Anyway, I really can’t wait to finish this sweater as I think it will get lots of wear! Well, assuming it fits, you never know (crossing fingers)!

Watching the Seagulls

Seagull1Wouldn’t this hat be perfect for a stroll along the North Sea? I chose the colour of the straw first, then I saw the block I would be using, with its cloche-like asymmetric brim, and I immediately had this idea of a hat that would evoke sea bathing in the 1920s. So I decided to add blue and white trim in order to achieve that look.

Seagull2It took me a long time to complete, since as per usual with my hats I let it lie unfinished for too long because I sort of lost interest after I had done most of the work and I had to begin another hat for millinery class. But I have just realised that the end of the schoolyear is fast approaching and that I’d better quickly finish all of those languishing projects!

Seagull3The base is parasisal, molded in two pieces (one for the crown, one for the brim) then sewn together. The trim is store-bought bias tape. Seeing as the polka dot one wasn’t wide enough to look right around the base of the crown, I sewed three lengths of bias together (that’s the only thing that was machine-sewn by the way, and it was also sewn by hand to the hat): two polka dot ones at the sides and one solid in the middle. The one at the edge of the brim covers millinery wire, which you can see has suffered a little bit at the back from being lugged in my backpack (that’s when I realised I had to find a better way to carry my hats when going to class on my bike!).Seagull4I added this strip to cover the seam at the back of the trim, and I thought gathering the trim in a smaller tube would add more visual interest than leaving it straight all around.

Seagull5The inside of the hat (I used a wider petersham ribbon than usual because that’s all they had in that colour in the store), plus you can see the asymmetric brim more clearly. All in all I’m happy with this hat and it really looks like I had envisioned it, BUT in order for the crown bias not to gape I tightened it a little too much and as a result the hat is now a little too small (which it wasn’t before). I’m leaving it as is for the moment because at least it really stays in place on the head (which is nice if I ever bring it to the sea – hello wind!), but I’ll loosen it if it’s actually uncomfortable after wearing it for real.

Have a nice weekend!

Enregistrer

Me-Made-May ’13 – Week Five / The End!

It’s over! I can’t believe I made it to the end and I stuck to my pledge!!!

DAY 27

Day27The skirt is me-made, you’ve seen it twice already (on Day 2 and Day 21). I said before I was sure I would be wearing it a lot more during the month since it is one of my favourite pieces, but the fact that I didn’t have to resort to it too often is actually a good sign: it means I did find other things I was as happy to wear. But on Day 26 I was feeling bizarrely fed up with the whole choosing an outfit thing (and taking my picture, as you can see by my face – this is the picture where I least looked like I wanted to kill myself!), so I was glad I could turn to my “uniform” for days I don’t want to bother but still want to feel cute: this skirt with black tights, T-shirt, cardigan and accessories.

DAY 28

Day28

You always have more time to pick an outfit on days when you don’t work, so I was able to experiment a little more than usual with my me-made skirt (seen on Day 7 and Day 18). Still don’t know whether I really liked this outfit or not. But do you see how dark the picture is (after I lightened it A LOT)? There was so much rain on that day, it was like taking a picture at night.

DAY 29

Day29A me-made cardigan (worn on Day 24) with a vintage dress (from the eighties I think) I love. Not the most flattering combination and the colors are a little bland, but I liked the twenties flair of the outfit anyway.

DAY 30

Day30The skirt (also see Day 17, Day 19 and Day 25), cardigan (see Day 23) and hat are me-made. Looks like I needed cheerful colors on a very gloomy day.

Day30Hat

I had totally forgotten about this hat and rediscovered it by opening my biggest hat box which I needed in order to carry the hat I’m working on to and from millinery class. It’s the very first hat I ever made! I made it two years ago in this two-day millinery training I took; it’s a one-piece felt with hand-molded brim. There’s a blue stain under the brim and I picked grosgrain instead of petersham ribbon for the sweatband and the trimming, plus I didn’t sew that grosgrain very professionally, but I still quite like the form and I sure LOVE the bright color!

DAY 31

Day31I didn’t know what to wear, then I realised I hadn’t worn this cardigan (the link is in French) I love yet, and I thought it would pair nicely with the me-made dress I wore on Day 6. About the dress, I think it looks better with flat shoes than with heels. The cardigan is a little short (especially the sleeves) but I still love it (it has bows! And it sparkles!).

And that’s it for Me-Made-May ’13! I was so happy not to take my picture this weekend!!!

Though Me-Made-May was not as difficult as I had anticipated (i.e. I actually made it to the end of the month), I must say it was still really challenging to find 31 different coherent outfits throughout the month. I’m really glad I took part in the challenge as it had me experiment a lot more than I usually do with my outfits, and it also highlighted a few gaps in my wardrobe (trousers, relaxed clothing and a dressier jacket) and helped me see how I should also sew more separates to be able to diversify my outfits a little more (though I still love wearing dresses and will never stop sewing those!). Also, it made me totally comfortable wearing hats on a more regular basis, yay!

There are still a few me-made pieces I didn’t wear during the month, for various reasons:

– this winter sweater is too warm, even for such a cold month of May (especially at work where the heating is still on and we have to open the windows in order not to faint because of the heat – nope, we can’t turn it off or down and nope, that’s not so green!).

– This knitted blouse (link in French), my beloved Datura, a refashioned T-shirt and two summer dresses are going to have to wait for warmer days for me to be able to wear them.

– I fell out of love with a blouse and a dress I made at the very beginning of my sewing “career” and I’m going to either reuse the fabric or donate them, like the dress I wore on Day 5. The same goes for three sweaters and a cardigan I knit that look like sacks: they’re going to the “unravel and reuse the yarn” pile, no regrets.

– This jacket I don’t know: it’s cute but not very practical with its 3/4 sleeves and especially the fact that it has no pockets. I’ve NEVER worn it. Not once. I’ll keep it for now because I’m not ready to part with it yet (I put a lot of work into it) and I’ll reassess it in the future.

Wow, I now also have a sort of record of all of my me-made clothing (minus some hats and scarves)! Thank you Zoe for hosting such a great challenge!