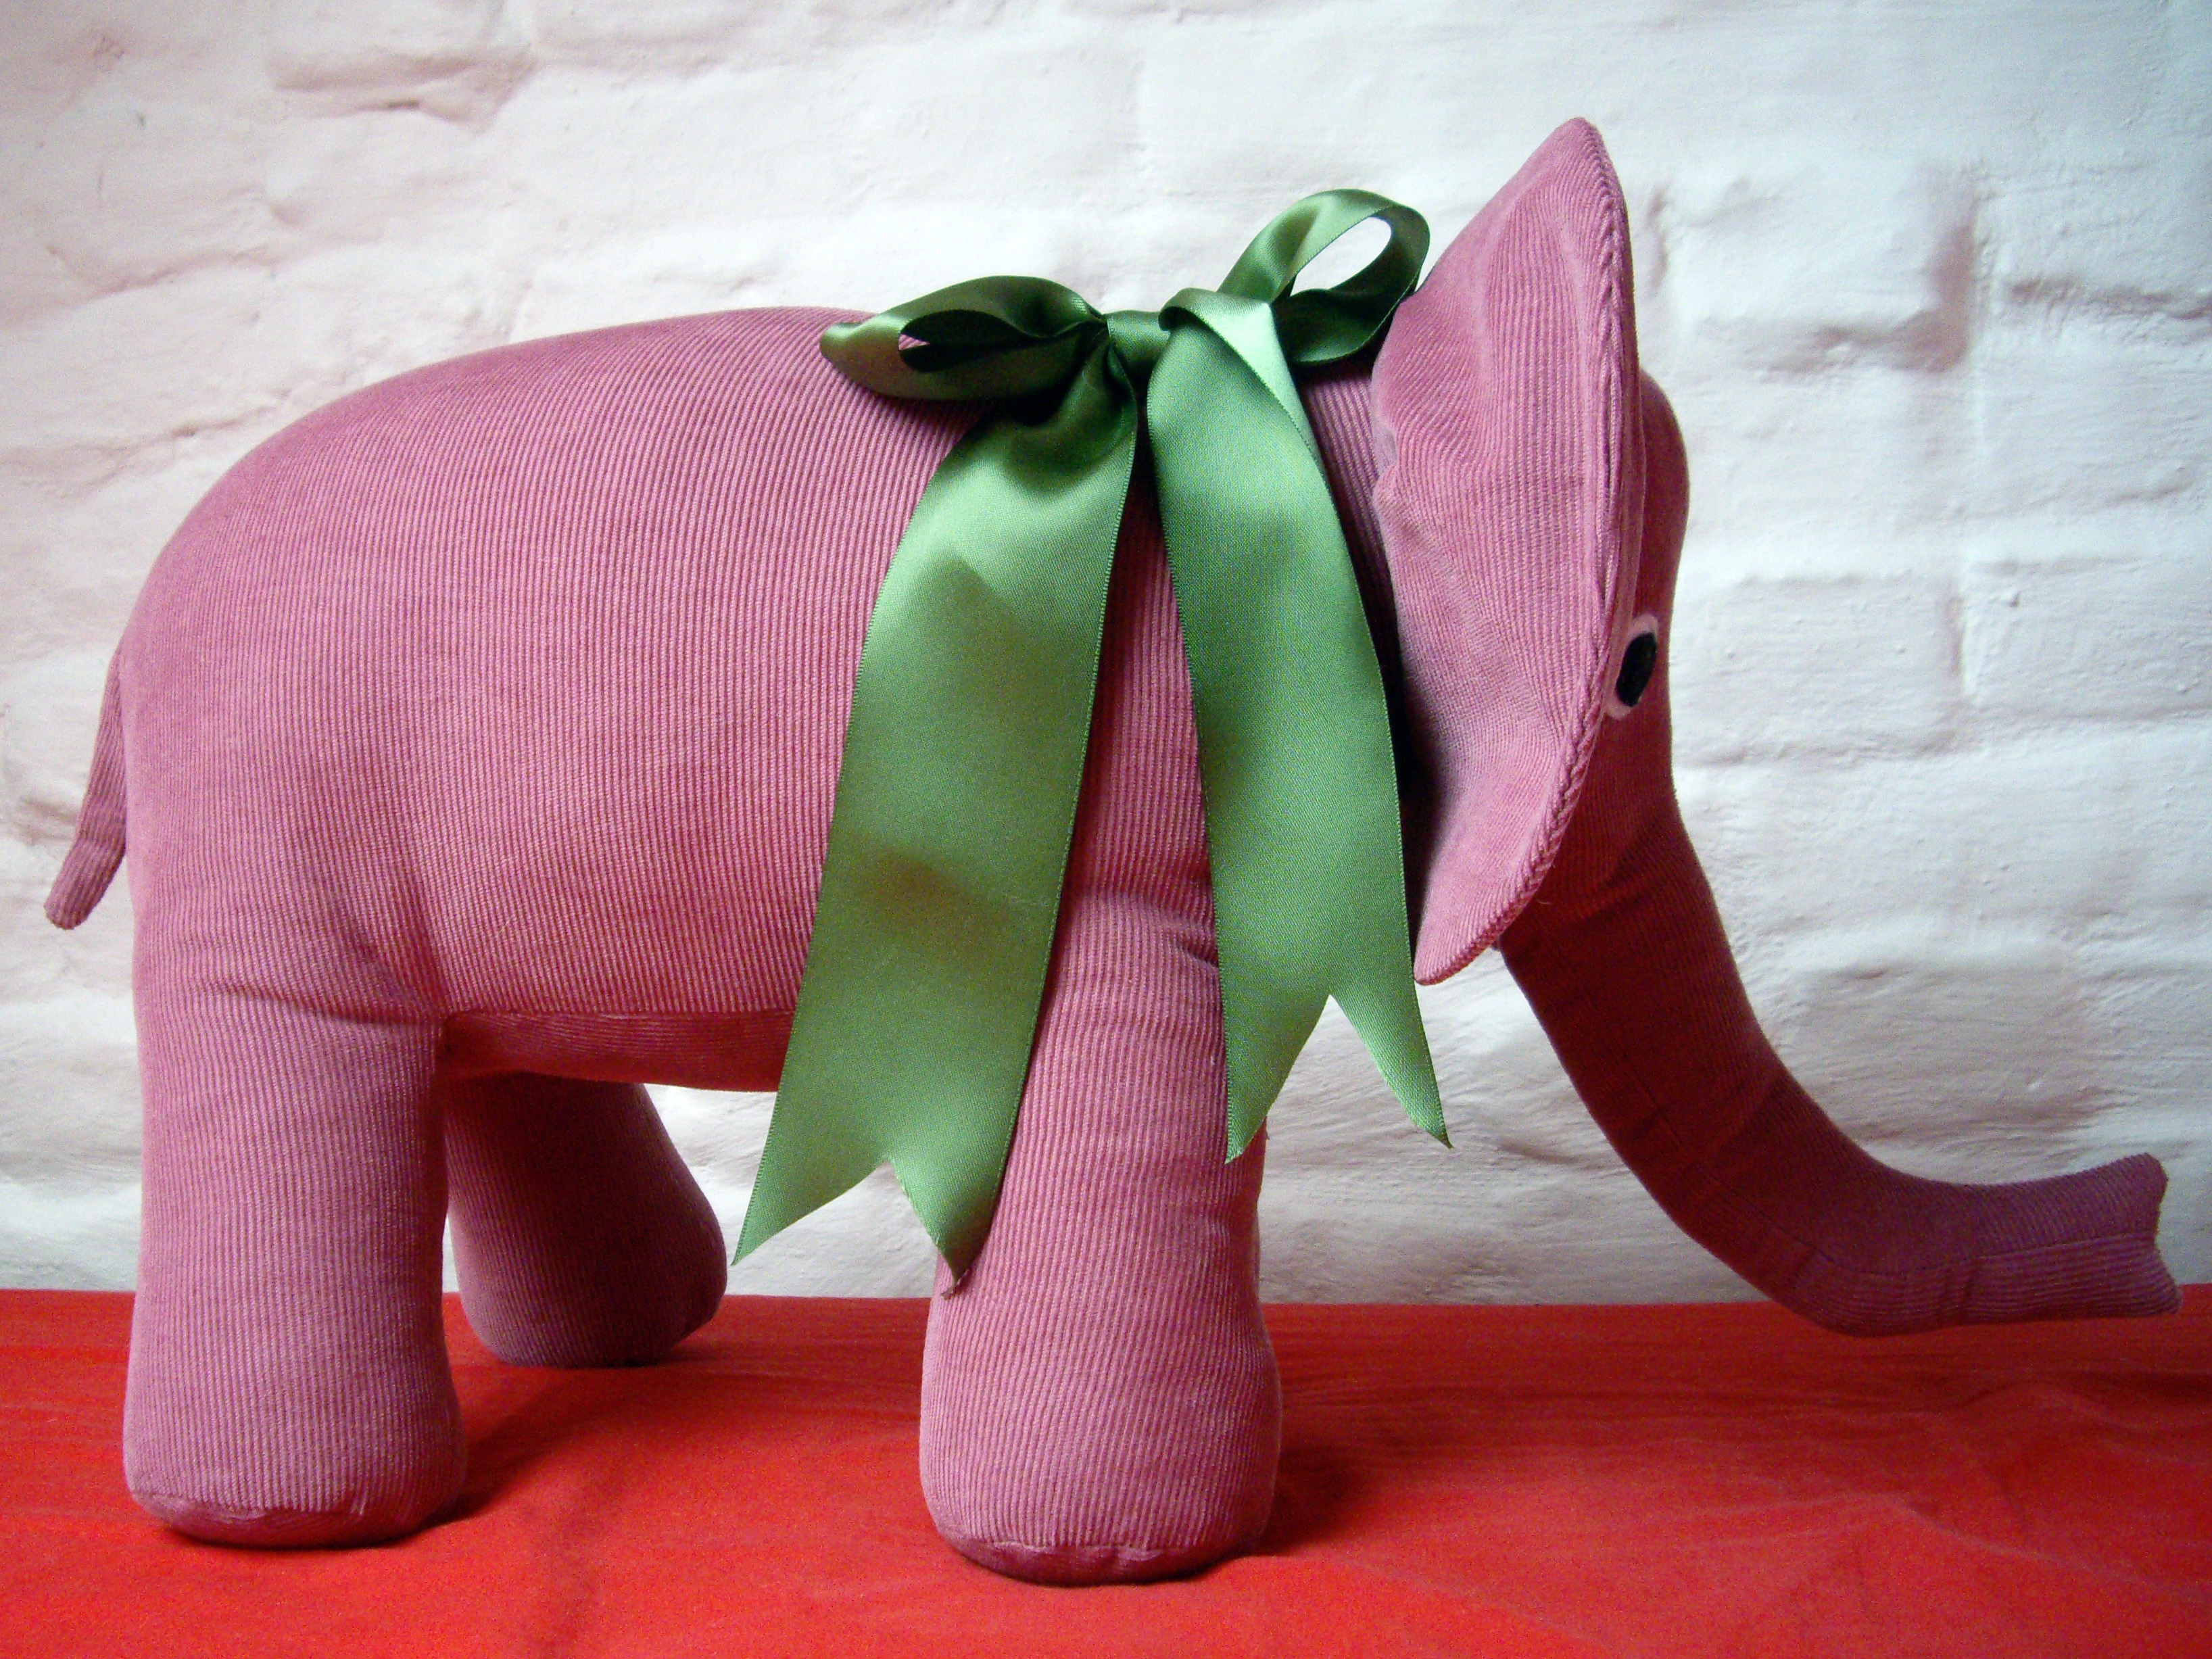
I still haven’t finished my coat, so it’s official then, my first finished project of 2014 is a pink elephant! And it’s not even for me! Will you look at that face: how am I supposed to let it go?
Last Wednesday I was working on my coat and kind of loosing steam when I realised I had completely forgotten to either buy or make a gift for one of my best friends’ baby girl’s first birthday the next day. I thought no problem, I’ll use that cute elephant pattern I recently bought and I’ll be done in no time! Hahaha, how wrong was I?
 After spending the whole evening and Thursday morning working non-stop on the elephant, all I had were an empty body sans tail and an empty head sans eyes and ears. Turns out the pattern is cute for a reason: it uses a thousand pieces with darts and you have to clip/notch about a million curves! Nothing difficult really, but time consuming, oh yes!
Let me cut to the chase, I finished the elephant yesterday. Yep, it took me four days to make a stuffed elephant, I’m definitely not the world’s fastest sewer, if one still needed proof!
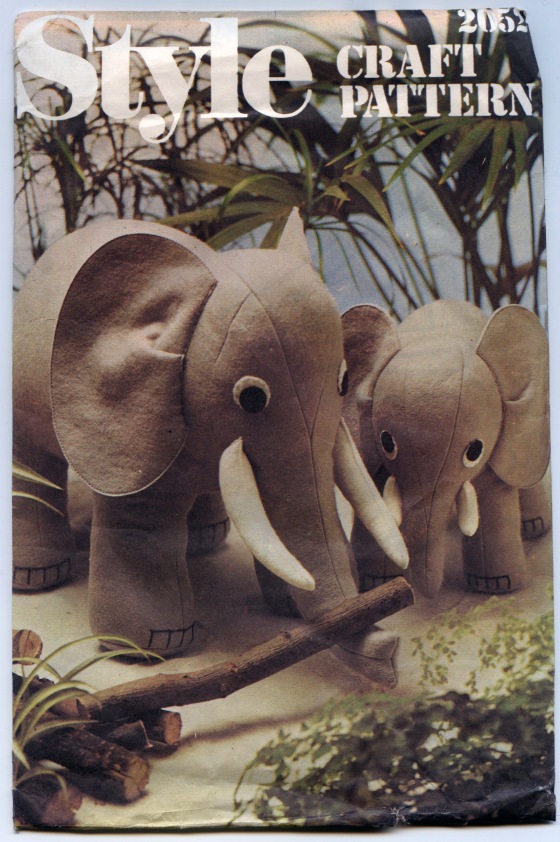 The pattern is Style Craft Pattern 2052, from 1979. There are two versions: adult and baby. I chose the adult, but I didn’t think to check the measurements of the finished elephant, so I was kind of surprised to see the size of the beast: 30 cm at shoulder height, 40 cm length without the trunk, oops! Ah well, I’m not the one who’s going to have to find a place for it in my apartment!
What I didn’t like in the pattern (except for the fact that they would have you baste most seams before stitching them – I didn’t and I had no problem whatsoever) was the fact that you have to hand stitch the tail, ears and tusks (as you can see, I chose to omit the tusks: the elephant looks way cuter for a baby without them) afterwards instead of sewing them into seams. The eyes are also supposed to be hand sewn afterwards, but I machine sewed them before attaching the head to the body. There are no seams where you add the ears, so there’s no other solution for them (and it’s possible to get a nice and secure result with invisible stitches, contrary to what the envelope picture would have you believe…), but if I ever sew that pattern again, I’ll be sure to sew the tail into the back seam: it will look better and be more secure.
Also, the sample is sewn in felt, so the tail and ears (and tusks) are sewn wrong sides together, with visible seams. Since I used corduroy (remnants from this skirt) and I didn’t want it to fray, I sewed the ears and tail with right sides together. This caused no problem for the ears, but for the tail I had to adjust its end so that I could turn it right side out.
 Stuffing the elephant was an adventure of its own. I bought a giant (and I mean GIANT, like 1 cubic metre!) bag of polyfil for a song at least seven years ago and although I had used some for a few projects, it must have been self-regenerating or something because all of my projects barely made a dent in it. But this time, the giant polyfil bag has found its master! The elephant literally ate most of it, leaving me with about a fifth of it, if not less. The pattern has you stuff it firmly, so you wouldn’t believe how much polyfil there is inside. And it was not an easy task getting it all in: it took me about an hour, sweating and short of breath, and my arms are still a bit sore.
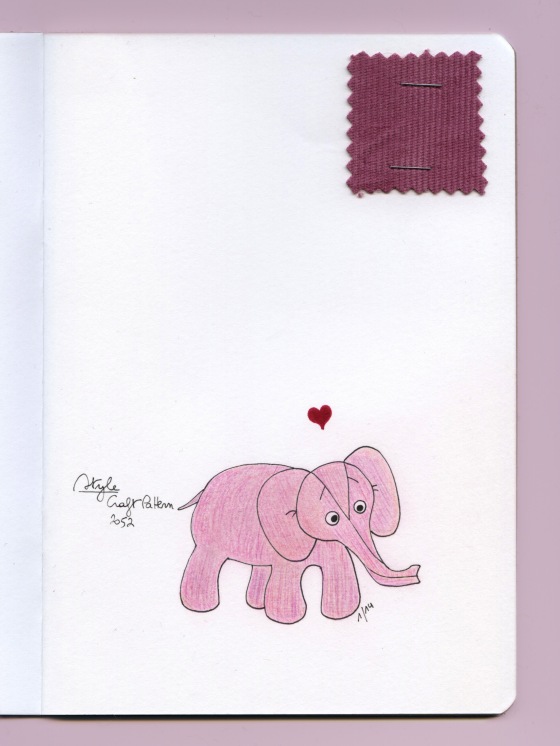 It’s not easy drawing with a sore arm, but I didn’t want to abandon my resolution, so here’s the third page of my sketchbook! I normally draw before finishing a project, but the impromptu nature of this project made it impossible, so afterwards it had to be.
I’m really happy with the end result of the project, I’m not kidding when I say it’s going to be difficult to give it away! I really took my time (four days, you bet I did!) to get the best result I could and there are not many things I would change if I had to do it again. And I want to sew that pattern again, though I’ll take filling my wardrobe over adding to the clutter of my home any day, so it will have to wait for another special occasion.
 It’s been so long since I last posted one of them, but I didn’t stop drawing sketches of my sewing projects. Some of them were missing their colours, others their little fabric sample, and the last two I still needed to draw altogether, but I finally got to drawing and finishing all of them, and the sketchbook is actually full now: there’s no blank page left!
 I won’t be starting a new sketchbook for my next sewing projects, I think one is enough, but I’m pretty stoked that I stuck to at least one of my resolutions for 2014! I hope this won’t stop me from going on drawing regularly in the next year, we’ll see…
 I don’t have a lot more to say about these drawings or sewing projects (I’ll probably write a round up at the end of the year, to tell about which garments I’ve been wearing or not and why, like I did last year), so I guess that’s it! You can click on each drawing to see the original blog post about the finished garment in question.
 I hope to be back soon with a new finished sewing project, it’s been such a long time since I last completed one! I’m working on two at the moment: a grey corduroy version of this skirt and a sweater dress that’s proving to be so unflattering on me I’m almost sure it’s going to end up as a cropped sweater instead!