Les chaussures d’Antoine

Antoine1What, these old things? Oh, you know, just some shoes I made, no big deal…

Yep, I MADE SHOES!!! SHOES I CAN WALK WITH AND EVERYTHING!!!

Antoine5The first assignment of the schoolyear was to make a pair of men’s shoes. Since I was less than thrilled at the idea of spending so much time on my first pair of shoes and then having to give it away to a [shudder] man, my first question was “can I make those men’s shoes my size?”. And the answer was yes, woohoo!

Antoine6We were asked to take inspiration from a couple (real or fictional) for this first pair of men’s shoes and a second pair of women’s shoes to come. My choice of inspiration was the couple formed by Antoine Doinel and Christine Darbon in Stolen Kisses, Bed and Board and Love on the Run.

So these are Antoine’s shoes: I wanted them to reflect his very classical 1960s/1970s sartorial style, which is why I chose this very conventional colour of leather and kept things very simple regarding ornementation.

Antoine4I didn’t think to calculate the number of hours it took me to complete this first pair of shoes, all I can tell you is it was a very long process with about a billion steps. I also know I messed up a lot of things (fortunately none of them too tragic), the worse of them being choosing a too thin leather for the lining, so brittle that it wouldn’t stop tearing when I was trying to last it. The bright side is, now I know what to check for when buying leather for my next shoes!

Antoine3

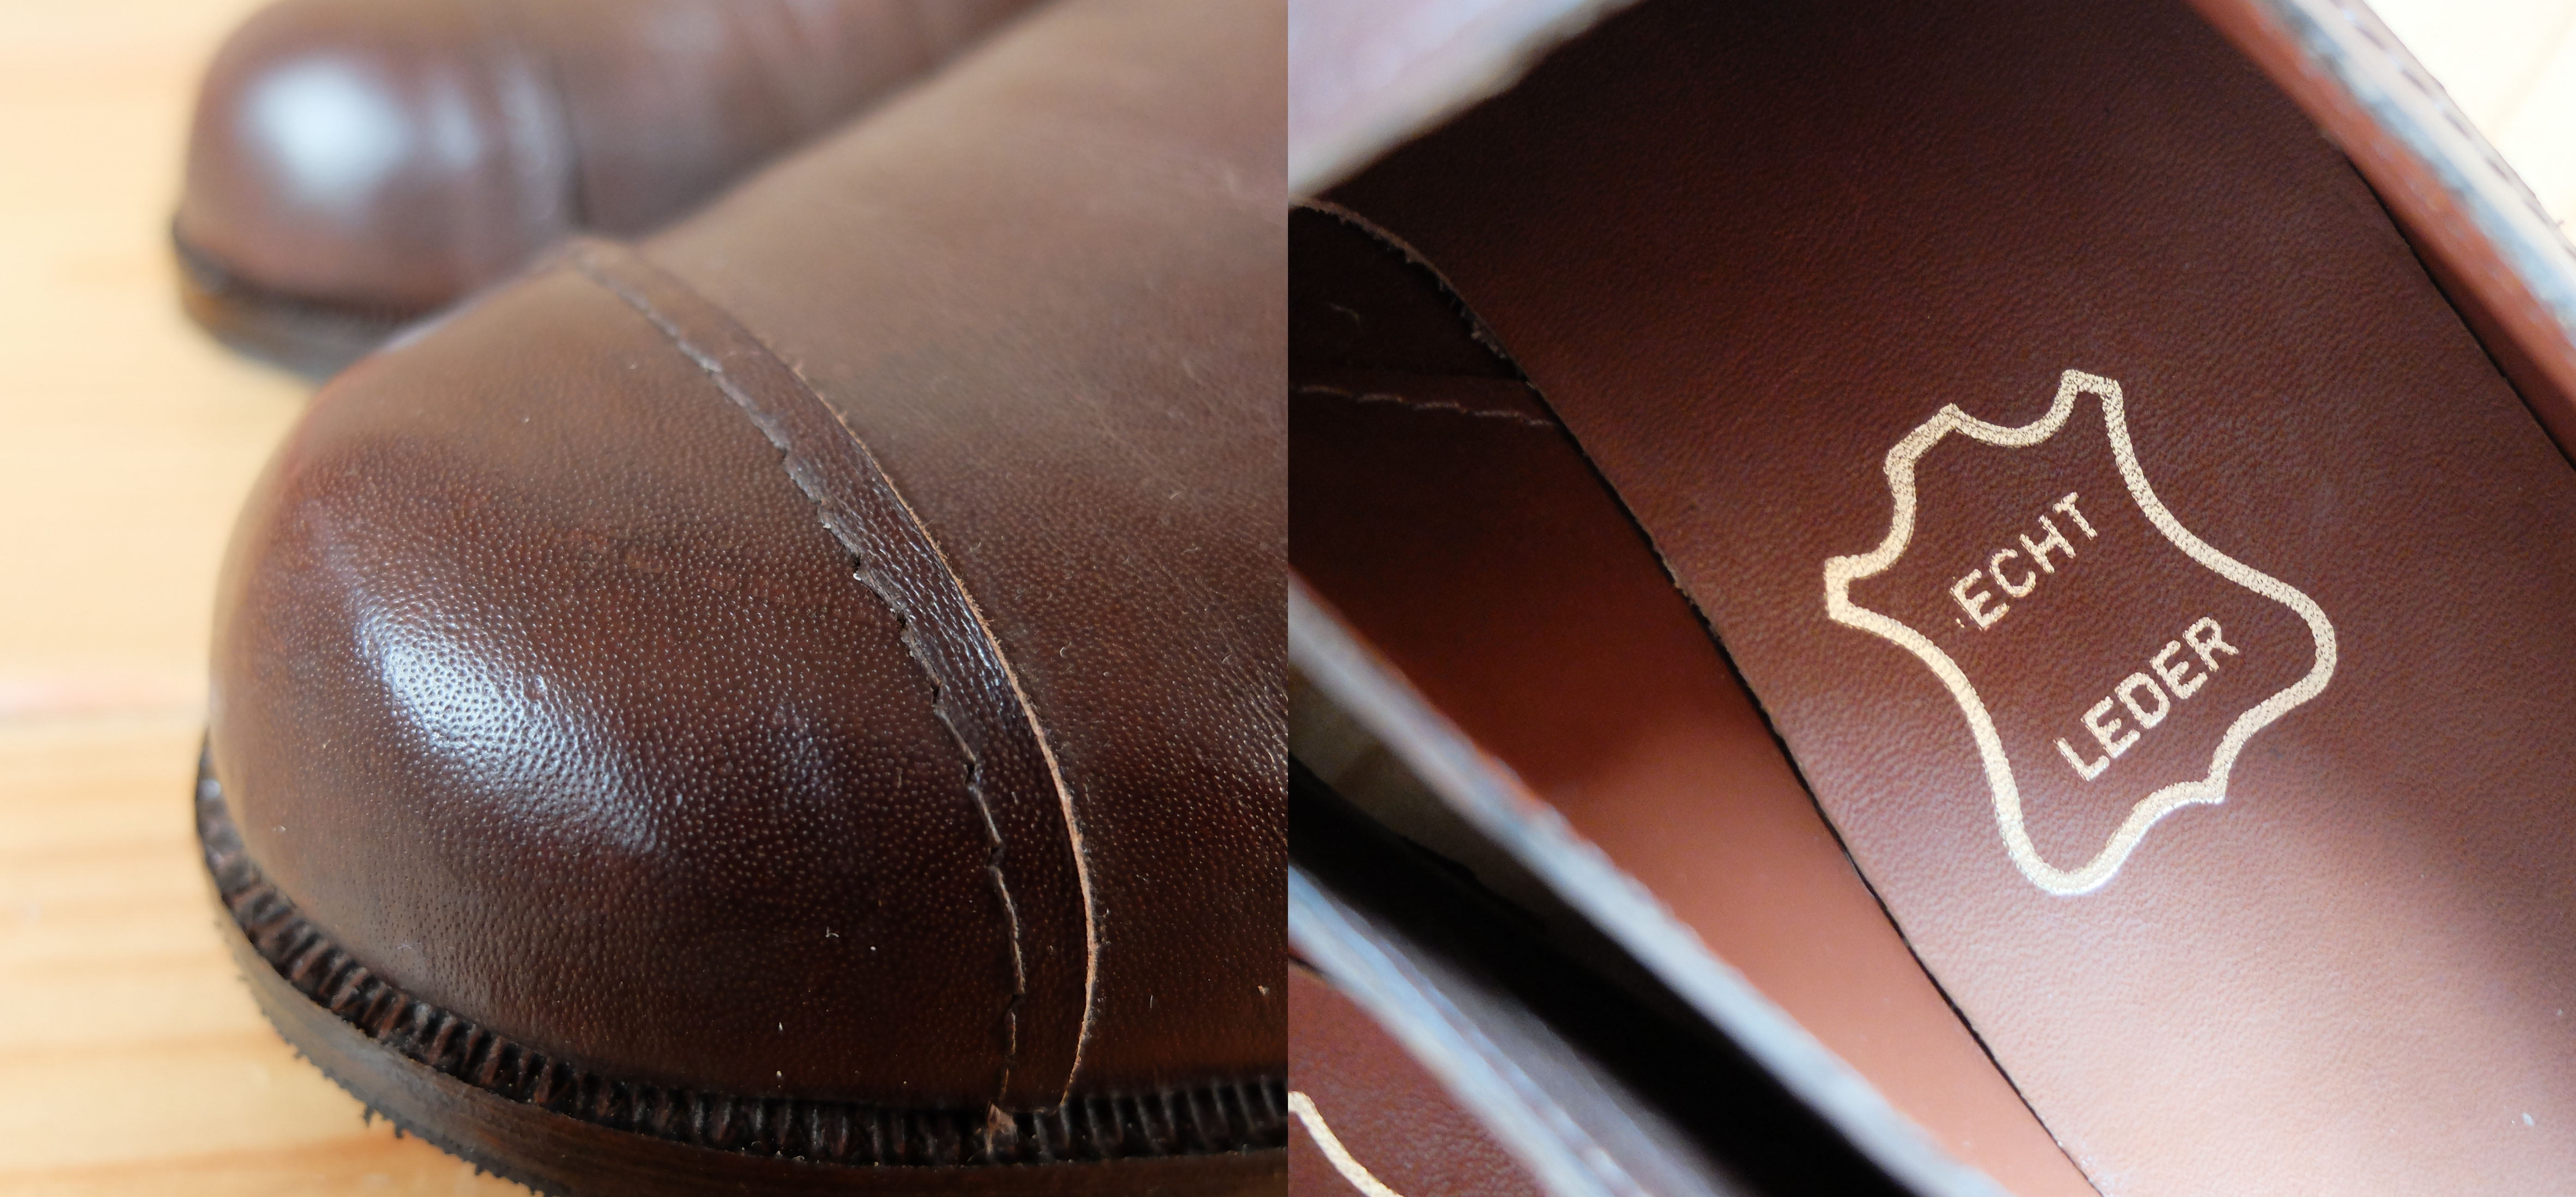
Is it lame that my favourite part is the “real leather” stamp on the insole?

On another bright side, none of my mistakes were unredeemable, and I MADE SHOES!

I was VERY proud to wear them for the first time last Wednesday and I had to refrain from telling everyone I met that I was wearing shoes I made myself!

Antoine2I’m probably not the least bit objective, but I feel like they go with everything. And they didn’t even fall apart when I wore them! 😀 The fit of the left foot is perfect, and the only problem of the right one is that I have a hammer toe on the right foot that has a tendency to rub against some shoes, which can sometimes become uncomfortable. Who knows, maybe I’ll be able to adjust that in future shoes I make?

Phew, I’m already exhausted even thinking about starting the next pair!

Sketchbook: Liberty Dress

FitzgeraldI can’t seem to get back to sewing my coat, and in the meantime it seems like I have a million dresses on my mind! The one I’m working on at the moment is a Sureau whose sleeves I replaced with the sleeves of the Bleuet dress and whose fake button placket I changed into a functional one which I lengthened to get a shirt dress. I also added side seam pockets (in orange lining) because, as you may already know by now, pockets are essential to me and my runny nose.

The fabric I’m using is Liberty of London Fitzgerald. This is my first time using such an expensive fabric so I’m crossing fingers everything goes according to plan!

While I’m talking about the fabric, I couldn’t be bothered trying to render it on my drawing, so I printed a picture of the fabric and I cut and pasted it to fill the dress, then I added the button placket and other details on top of it. Normally I would do that directly on the computer, but since I want the sketchbook to look as good as the version I’m sharing on the blog I prefered that option. And the result is really convincing so I’ll keep that technique in mind for the future!

Blue Stripes

BlueStripes2Woohoo, it’s a dress, not a tunic! And I felt totally at ease when wearing it to work, so it’s not even one of those projects I can only wear when I’m not working! And I love it, it’s very me! And it’s soooo comfortable! And, and, and… !

BlueStripes3In short, if only I had known when to stop the first day I worked on it, this could have been the perfect sewing project! But I didn’t stop when I was tired and it made me both use pins that were too thick (and blunt!) for the fabric, resulting in tiny holes at the side seams (where I had to pin a lot to match the stripes), and… cut a hole in the bodice with the serger blade while serging the waist seam! Twice. That’s how I lost a few centimetres of the bodice and ended up with a babydoll mini dress instead of a high waisted normal one.

BlueStripes4

Just checking… Yes, I can raise my arms without revealing too much!

But I’m pretty proud of myself because for once I didn’t freak out, I just thought ok, how do I fix it, and fix it I did! Also, I’m terribly happy I chose to use this cheap fabric to test run the dress I had in mind instead of the precious fabric (like really precious: there are foxes involved!) I eventually plan to use.BlueStripes5The stripes are still a bit uneven at the waist seam on my left side, but I didn’t think I could fix that without loosing too much length. I first wanted to cover it up with a bow, but I finally chose to let it be, and I must say I don’t see it anymore unless I’m looking for it specifically.BlueStripes6As I said when I showed you my sketch of the dress, the pattern is Sewaholic’s Renfrew top. I changed the top into a dress by adding a gathered skirt. I also added patch pockets (I love patch pockets: easy and cute!) and I omitted the sleeve bands (and lengthened the 3/4 sleeves) and cut my own collar band. I gathered the skirt with elastic, but when I had to redo the waist seam, the elastic got cut away, which resulted in a looser fit, perfect for a babydoll dress.

BlueStripes1I took the pictures coming back from work yesterday, so this is the exact outfit I wore to work. I really don’t understand why black and blue shouldn’t be worn together, so I refuse to abide by that stupid rule!

Wearing a garment as soon as I’ve finished it is usually a sign of success, so I feel like I can say without a doubt that this dress will be worn a lot! I hope the couple tiny holes at the side seams won’t shorten its life too much, and I actually plan on mending those to prevent them from getting bigger. Anyway, let’s hope I learn from my mistakes and my next version goes without a hitch!

Sketchbook: Blue Stripes

BlueStripesI usually stick to one project at a time, but I’ve been soooo bored with my babydoll coat that I’ve allowed myself to put it aside and work on one or two easy projects before getting back to it. And what better suited project than the Renfrew? Especially since it’s not my first go at it, which means no more tracing/cutting the pattern and I know it fits!

Even so, I have already encountered a few obstacles: first, with only 1,30 m of the fabric I chose, I had to do some creative cutting in order to get a 3/4 sleeved dress out of such small yardage. Then I forgot that I’m no good at sewing after 9pm and went on sewing and making stupid mistake on stupid mistake… to the point where I had to shorten an already short dress in order to hide one of them.

Anyway, the dress is almost complete now, and it looks promising (albeit short) after all. See you soon with a new dress!

Hollyburn Hat

HollyburnHat1Remember this skirt? It was the first project I ever posted on my blog! I had been meaning to make a matching pillbox hat with the fabric remnants ever since I completed the skirt; I even had all of the materials ready, but it took me all of nine months to finally get to it!

HollyburnHat2I used a two-piece premade buckram form which I covered first with a layer of wadding, then with the fabric. Everything but the back seam of the fabric is hand sewn, which allowed me to work on that project mostly from my coach (why do you think I love hand sewing so much?)!

HollyburnHat3Why Hollyburn hat, you ask? Well, first because it’s made from the same fabric as my beloved Hollyburn skirt, a tweed/chevron wool with golden thread woven in, and second because I used the pattern of the waistband tabs of the skirt to add a double tab at the back of the hat! I also used the same wooden buttons as on the skirt: I had bought four especially to make a matching hat!

HollyburnHat4

Here you can see the fabric and double button tab better, as well as the matching skirt…

HollyburnHat5

… And here you can sort of see some of the golden thread that’s woven in the fabric. Much more visible in real life.

HollyburnHat6I lined the hat with the same lining as the skirt, beige Venezia, and I added a beige petersham ribbon. The only thing that doesn’t really match is the ribbon I used to secure the comb (the comb helps the hat stay on the head), but blue was all I had in stock the evening I finished the hat and I didn’t want to wait until the next morning to go and buy some. I don’t know how many of my projects feature that same ribbon: I have a lot of it in my stash, so every time I need some ribbon (to stabilize shoulder seams for example), that’s the one I use.

I’m really happy with the outcome of this hat, which is pretty exactly what I had in mind, and quite proud of the finishing details. The only problem is it’s not the easiest type of hat to wear nowadays (ah, to live in the sixties!), but I can still see myself wearing it from time to time when going out. Though my boyfriend might disagree on that one. His comment when I proudly showed him the finished hat: “Oh cute, perfect for when you go fox hunting!”.