All That Glitters

I hate linen. I hate how it wrinkles of course, but I also don’t really like how it feels against the skin and how the weave often sort of reminds me of burlap. But when I spotted this shiny piece of ⭐️GOLD⭐️ linen at Tissus Passion, like the magpie that I am, I forgot any bad feeling I had ever had about linen and brought this beauty home.

I immediately knew I’d make it into a pair of Deer&Doe Goji shorts, even though I’d had other fabrics in mind for those. And I made them right before leaving for Spain last year, when I realised how in dire need I was of shorts. Making them was pretty uneventful: I followed the pattern to the letter and I don’t remember encountering even the tiniest problem.
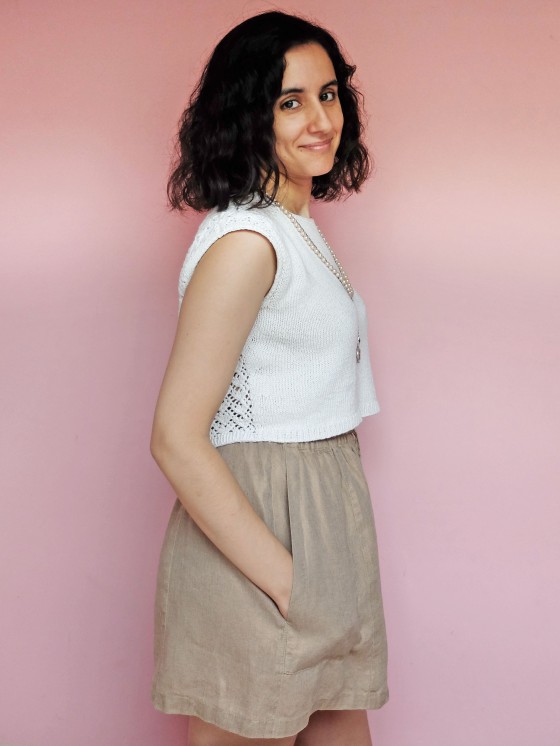
I cut a size 36 waistband, then traced the legs from a size 36 waist to size 40 hips. My hip measurements put me in the size 42 column, but I thought I could get away with cutting a hip size smaller with such a loose style. And I was right! Oh, and I was afraid it would be difficult to get in and out of the shorts with such a big difference between my waist and hips, but I was wrong!
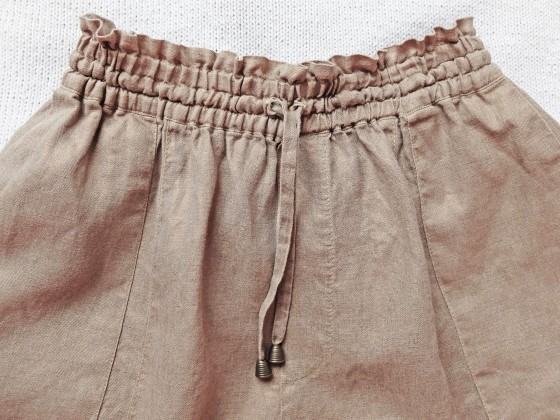
These shorts have been worn often enough last summer and this summer, but they could have been worn a lot more. Their only problem is… their fabric! It wrinkles SO. MUCH. I know I’m supposed to embrace the wrinkles, that they’re part of the beauty of linen, blah blah blah… I just can’t stand it! I feel like it makes me look so sloppy! This didn’t stop me from wearing these otherwise very cute (I love how they look like a very short skirt from certain angles!) and particularly comfortable shorts on very casual occasions (e.g. knitting afternoons on a stone bench), but I know I would have worn them way more often had I made them out of a cute cotton or viscose. At least now I know for sure. I. hate. linen.

Checkmate Dress

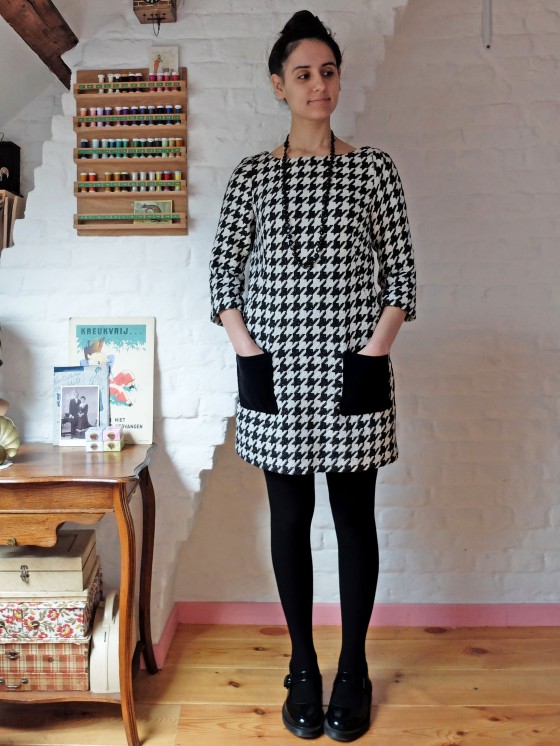
PiedDePoule1When I saw this dress in the September 2012 issue of BurdaStyle, I immediately fell for it and kept an eye open for a suitable fabric. I found what I thought was the perfect fabric about two years ago at the Stoffenspektakel, but I had so many other projects in mind that this one, like many others, got pushed back to end of the queue.

But this September, when I “needed” a dress for an upcoming party, this pattern seemed like the perfect choice.

PiedDePoule3I used black wool (from La maison des tissus) instead of the recommended leather for the pockets because I wanted the dress to be machine washable, and I didn’t bind the collar (I traced a facing instead). I also changed the back neckline for that of this top, which, in hindsight, was kind of a stupid idea: who wants to bare so much skin when wearing a thick wool winter dress?

I didn’t insert a zipper and the dress pulls on over the head easily. The idea of inserting a zipper on that b**** of a fabric was giving me nightmares, so I was relieved to have the possibility to skip this step! The fabric was the only difficulty I faced during the making of this dress, but without my serger, I simply don’t think I could have handled it! I literally breathed a sigh of relief once every edge of the dress was finished.

PiedDePoule4Sadly, I do not like the finished dress as much as I thought I would. It looks great on my dress form, but not so much on me… I cut a 36 for the bust/waist and graded to a 38 for the hips, when my hip measurement puts me in a size 40! With the fit and flare styles I mostly sew, I can usually get away with cutting the same size for the hips as for the bust and the waist, but I miscalculated the ease on this one, and as a result the dress feels a little bit tight at the hips. And with that fabric from hell, there’s no way I could let the seams out to gain a size. It’s such a shame, because I love the fit of those French darts!

PiedDePoule5

The dress and sleeve hems were serged, then turned and invisibly hand sewn.

This didn’t stop me from wearing it for two nights out, but now it’s waiting in storage while I figure out whether I’ll wear it again as a dress, shorten it to make a top, or donate it.

Ah well, at least now that the pattern has been traced, I can make another version, in my true size this time!

PiedDePoule2

Christmas Eve Outfit

Réveillon4It’s been a long time since I posted a finished garment, and here I am with some of the crappiest pictures I’ve ever posted on this blog, but they will have to do or I’ll never show you any of the last pieces I made, what with winter and its crazy lack of daylight…

I took these coming back from work yesterday around 3 p.m. (lucky me finishing so early! 🙂 ) and I barely had enough light long enough to take them.

Réveillon1So, this is the outfit I made to wear on Christmas Eve. Last year I made the dumbest choice by wearing this skirt which, although very comfortable for daily wear, became an instrument of torture after I had ingurgitated Christmas dinner. Which is why this year I decided I needed the most ample dress possible in order to eat as much as I wanted and not feel like my clothing was trying to kill me.

Réveillon2Enter my beloved modified babydoll Renfrew dress that could hold triplets and a whole turkey! I sewed the waist gathers the same way as for this one (this gathering method makes for a very loose-fitting waist), the sleeves are 3/4 like on this one, but I used a different method for the neckline: for once I didn’t use a band but simply turned under the neckline edge twice. I felt it was dressier.

Réveillon3The sleeves are wide enough for me to layer a 3/4-sleeved T-shirt under the dress for maximum Christmas (and cold weather in general) cosiness. I did not add pockets for lack of time, but I’ll probably add some in the near future because I keep reaching for them when I wear the dress, and of course I don’t know where to put my tissues.

Réveillon5The cropped sweater started its life as a whole nother project. I wanted a cosy sweater dress made from this glittery sweater knit I had recently bought, but when I tried it on I realised it looked positively awful on me! I have no problem wearing things that don’t make me look as thin as possible, or that make me look pregnant for that matter (I guess the outfit I’m showing you today kind of proves my point! 😀 ), but I do wearing things that make me appear deformed! I put the dress aside, feeling there might still be a way to rescue it, and when I started thinking about my Christmas outfit, I immediately thought simply cropping it might make it the perfect companion to the little black babydoll dress I had in mind. And indeed it did!

Réveillon6

I must have been Captain Harlock in a previous life!

I also cropped the sleeves, which were about as unflattering as the rest of the dress when they were full-length. Since my fabric has mediocre stretch recovery, I put some wide elastic in the cuffs to prevent them from getting distorted over time. It does feel pretty stiff, which was weird at first, but it doesn’t bother me anymore.

The original collar of the dress also stood very weirdly and/or didn’t suit me at all, so I simply turned it under and topstitched it in place. I was surprised by how good it looked after this simple transformation!

Réveillon7I have been wearing this exact same outfit a lot since Christmas, but I haven’t worn the two pieces separately yet, which is weird since a black dress and a neutral sweater (gold and silver are neutrals to me – I’m not even kidding!) shouldn’t be too hard to combine with the rest of my wardrobe. I guess I just like them so much together!

The Last Summer Dress

Centaurée1According to my Instagram, I started sewing this Centaurée dress at the beginning of July, and I finished it two weeks ago. Two months from start to finish, wow… It didn’t help that I spent three weeks away from my sewing machine of course, but still; I couldn’t bear seeing it hang unfinished in my sewing space anymore! At least it was still summer when I finished it, so I was able to wear it once before storing it away!

Centaurée2What took me so long, you ask? Well, I had this great idea in my head of gold piping between the geometric panels. Which means I had to line the bodice. And shell fabric plus lining plus very thick piping equals way too many layers at the side seams for the zipper to lay smoothly. I tried inserting that zipper about five times; I even tried hand-picking it to get more control, but to no avail. I thought I had to either make do with a horribly shoddy zipper, or say goodbye to my gold piping dreams.

Centaurée4Then it occurred to me, I could sew the side seam shut and insert an exposed zipper at the back instead! I found this white zipper with gold teeth in Paris. I thought it was going to look perfect on the dress, but back home I realised it was a separating zip. I could have kicked myself! I looked for a replacement here in Brussels, but apparently metal teeth zippers are all separating?

Anyway, once again I had to think of a plan B, which was to cut off the bottom of the zipper, cover it with a piece of the gold bias tape I had used for the piping, and call that a design feature…

Centaurée5There was no way I was not finishing that dress after all the time I had spent sewing the bodice panels! And the piping, oh my! Not even the execrable fabric could stop me from soldiering on. When I bought it it was advertised as 100% cotton, but the last time I went to that place they had changed the sign to cotton/poly blend. You know how they say that blends take the best of each fibre? This one took the worst: it wrinkles like cotton, but it presses (more like, doesn’t press) like polyester.

Centaurée3After all the problems I had during the making of this dress, it took me a few days before I could tell whether I liked the result or not. It’s not perfect, but I love its shape, which I find very flattering (at least from the front. As you can see in the picture above, there’s a small risk of looking pregnant from the side, ah well!) and all the little details I added such as the flat piping, the gold topstitching and the patch pockets!

Centaurée6

Marcianita Dress

Viviane1Oooh, shiny! Maybe too much? And also too puffy? That’s what I thought when I sewed the yoke on and saw it on the dress for the first time, especially after my boyfriend saw it too and started singing this (warning: that link makes noise!) and joking about how funny it was that I was going to a 1920s party with a futuristic costume.

Viviane2But as I said yesterday, even though it’s a bit kitschy, I actually like the end result and I’ve worn it a few times already on days when I wanted to be comfortable yet put together, so I call it a success! It’s not perfectly comfortable, the armholes are a touch too tight (and they have a tendency to wrinkle after I wear the dress for some time), but it’s subtle enough that I don’t really think about it while wearing the dress.

Also, the fabric I used (a silk voile I bought for a song!) is so lightweight that the slightest gust of wind makes the skirt portion fly out and reveal, well, everything under it, oops! Let’s just say there have been a few instances when I was grateful I was wearing opaque tights.

Viviane3

I don’t really know what is happening there. Is that my Marcianita pose?

The pattern (Viviane by République du Chiffon) is a pdf you have to assemble and trace, which doesn’t bother me too much as I trace all my patterns, and at least this means you don’t have to print and assemble too many sheets of paper, but it was a MAJOR pain assembling those sheets as none of them did match! I had to “gather” the paper in many places so that all the lines would remotely correspond to each other, not a pleasant experience. Other than that the pattern was ok and the instructions were clear, though if you ever make it I would advise drafting a facing for the lower part of the yoke to get a rounder and more even edge: if you follow the instructions for that part like I did and just turn the edge under, it’s pretty much near impossible to get a smooth result, especially with a lamé like I used.

Viviane4Oh yes, and I know I’m really slow, but I was surprised at the time it took me to sew the dress compared to how easy it looks, but this may have to do with me using French seams and adding side-seam pockets, or just being even slower than I thought I was… About the pockets, I added them in the skirt part and I was afraid they would be too low, but I don’t need to perform contortions to put my tissues in there or take them out and my hands are in my pockets in most of the pictures I took, so I guess they must be in the right place.

So all in all, this was not the perfect project I hoped it would be, but it’s still a nice dress and I would not rule out making it again with a few modifications now that it’s already been traced.

PS My blog is one year old today!!! Thank you so much for reading! 🙂

Viviane6

Hollyburn Hat

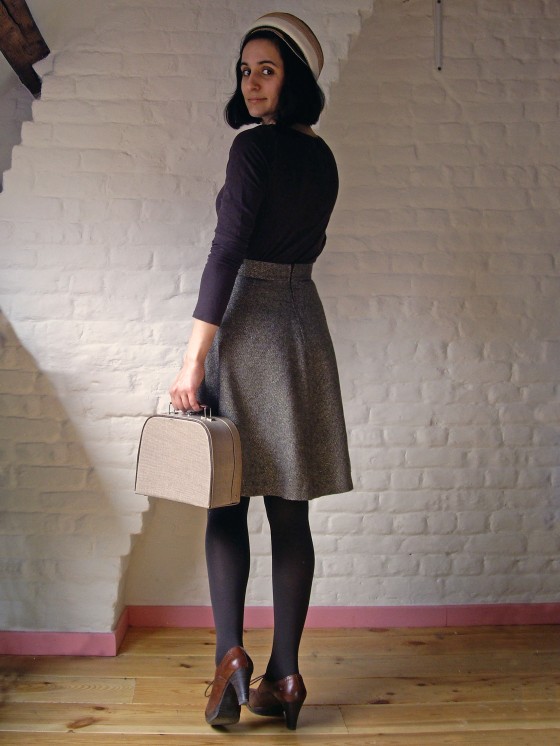
HollyburnHat1Remember this skirt? It was the first project I ever posted on my blog! I had been meaning to make a matching pillbox hat with the fabric remnants ever since I completed the skirt; I even had all of the materials ready, but it took me all of nine months to finally get to it!

HollyburnHat2I used a two-piece premade buckram form which I covered first with a layer of wadding, then with the fabric. Everything but the back seam of the fabric is hand sewn, which allowed me to work on that project mostly from my coach (why do you think I love hand sewing so much?)!

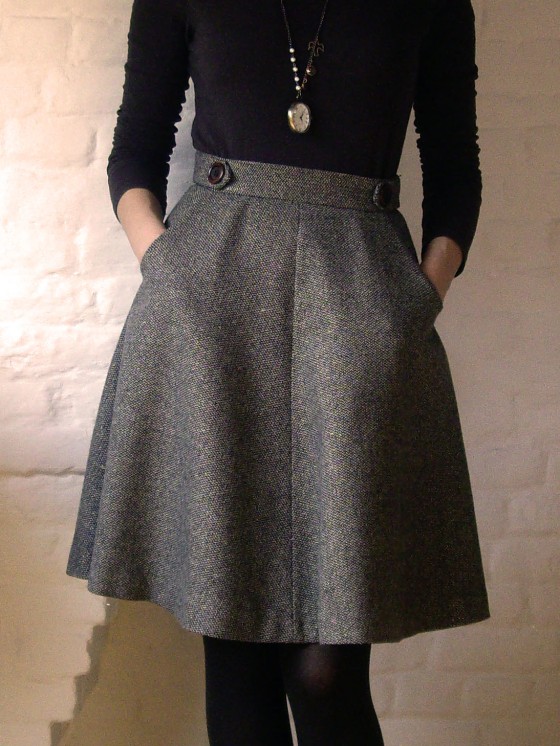
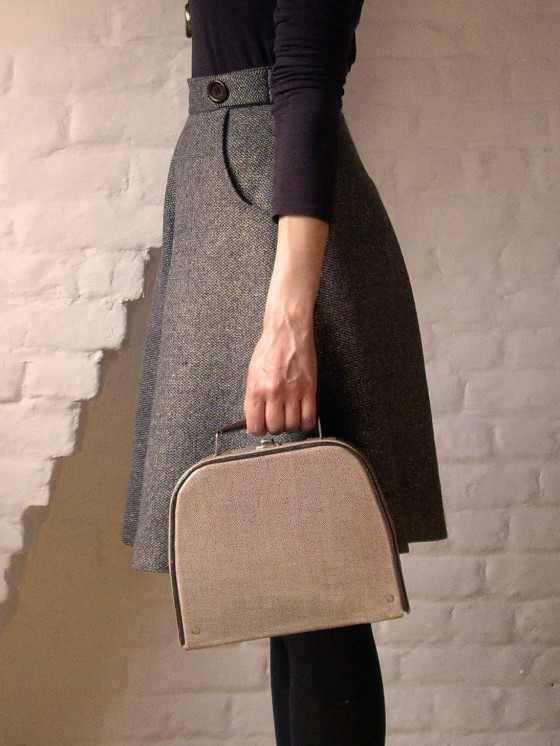
HollyburnHat3Why Hollyburn hat, you ask? Well, first because it’s made from the same fabric as my beloved Hollyburn skirt, a tweed/chevron wool with golden thread woven in, and second because I used the pattern of the waistband tabs of the skirt to add a double tab at the back of the hat! I also used the same wooden buttons as on the skirt: I had bought four especially to make a matching hat!

HollyburnHat4

Here you can see the fabric and double button tab better, as well as the matching skirt…

HollyburnHat5

… And here you can sort of see some of the golden thread that’s woven in the fabric. Much more visible in real life.

HollyburnHat6I lined the hat with the same lining as the skirt, beige Venezia, and I added a beige petersham ribbon. The only thing that doesn’t really match is the ribbon I used to secure the comb (the comb helps the hat stay on the head), but blue was all I had in stock the evening I finished the hat and I didn’t want to wait until the next morning to go and buy some. I don’t know how many of my projects feature that same ribbon: I have a lot of it in my stash, so every time I need some ribbon (to stabilize shoulder seams for example), that’s the one I use.

I’m really happy with the outcome of this hat, which is pretty exactly what I had in mind, and quite proud of the finishing details. The only problem is it’s not the easiest type of hat to wear nowadays (ah, to live in the sixties!), but I can still see myself wearing it from time to time when going out. Though my boyfriend might disagree on that one. His comment when I proudly showed him the finished hat: “Oh cute, perfect for when you go fox hunting!”.

Mulberry Turban

Mulberry2.1Wow, looks like I’ve acquired quite a taste for really intricate knitting projects! Will I be able to knit with needles smaller than 10 mm ever again? Will I even remember how to purl when the dreaded time comes to move past garter stitch?

Mulberry2.2So, I made a turban (more like, a headband that looks like a turban). And the worse part is, it wasn’t even on purpose. I still had a bit of yarn left after completing my Mulberry set, so I decided to use it to knit a big bow for the hat. I cast on ten stitches and I knit until I had almost no yarn left, thinking I’d fold the result in two and gather the center with a small band I’d knit with the very last remain of the yarn. I tried that, and even though the bow was cute, it clearly did not belong on the hat. It was way too bulky and did not look flattering at all from most angles. So I took it off the hat and threw it aside on the couch, much to the delight of my cat who immediately adopted it as a new favourite pillow.

Mulberry2.3It was only a few days (and thus a multitude of cat hair) later that I saw it lying on the couch and had the idea to take off the small piece in the center and see whether the remaining band fit my head so that I could use it as a headband. And, as you can see, it did! I gathered the seam (and made heavy use of the lint roller) and voilà! Instant turban!

Mulberry2.4And look, I can wear it on the matching hat to get extra coverage against the cold! I also really like the retro touch it gives to the otherwise plain hat. Now that looks like a turban!

Mulberry2.5So, this is clearly not the most impressive project, but I have already been wearing it a lot, which makes it a complete success. OK, the only downside may be that I had to rip her favourite pillow away from my cat. Sorry, Olivine!

Mulberry Set

Mulberry5Last Friday, for the monthly meeting of my knitting group, I was reluctant to take my current knitting project with me: it’s a very simple project, except for five rows of lace that I had to frog six or seven times (I actually lost count after a moment) because of small mistakes I could not fix without ripping the whole lace part (it’s the kind of lace you have to work even on the back rows, you don’t just purl those)! I was once again at the beginning of that tricky part, so I didn’t want to risk ruining it again by not paying enough attention while chatting away with fellow knitters.

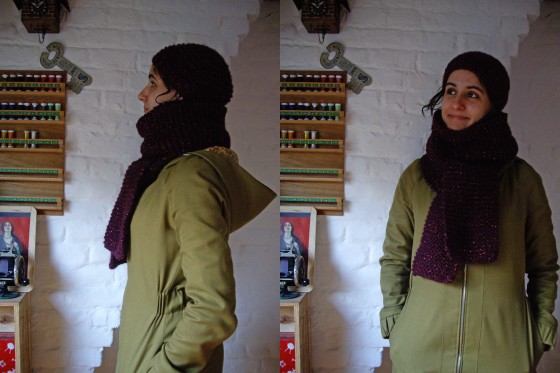
Mulberry1So I decided to break my self-imposed no UFO rule and bring a simple project I could knit without even looking instead: enter the garter stitch scarf, knit with 10 mm needles! I hadn’t knit a scarf in years: I used to knit one scarf every winter when I didn’t know how to knit “real” garments yet, but since I learnt how to knit shawls, cardigans and sweaters, I hadn’t even thought about knitting a simple scarf, as if it was too easy or something.

Mulberry2It was sooo easy, and such a relief from the lace that had begun to challenge my sanity! I started knitting it on Friday evening and finished it on Sunday, and it’s not like I spent my whole weekend knitting either. Oh, and I made a matching hat on Monday with the leftover yarn!

Mulberry3The yarn is Avelita by Schachenmayr, in a beautiful deep purple colour. I don’t know whether you can tell from the pictures, but it’s sparkly thanks to a pink/purple metallic thread. The garter stitch showcases the glitter effect beautifully.

I cast on 15 stitches and I knit until the end of the seventh ball, which makes for a really long and squishy scarf that you can wrap around your neck up to four times (I only wrapped it up to three times in the pictures). For the hat, I cast on 46 stitches in the round. I knit ribs for a few centimetres then garter stitch.

Mulberry4I’m really happy with my scarf anf hat set and they’ve already been keeping me warm all week (nothing beats four wraps of scarf when you’re biking to work early in the morning!). I should stop thinking that very simple projects are not worth knitting, especially when I see how rewarding it was to get a finished project I’ll get a lot of use out of in four days instead of a (few) month(s). And finally, I own a scarf that is not green! No more (unintended) clashing outfits!

Pirouette, Cacahuète!

Peanut1

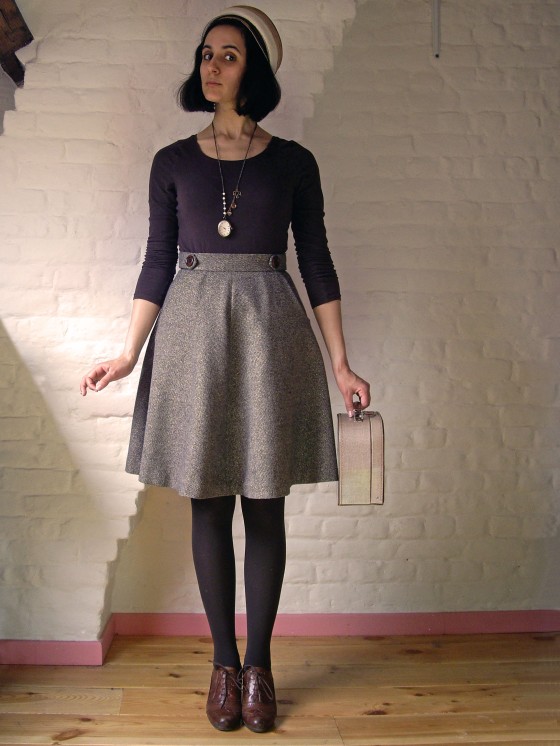
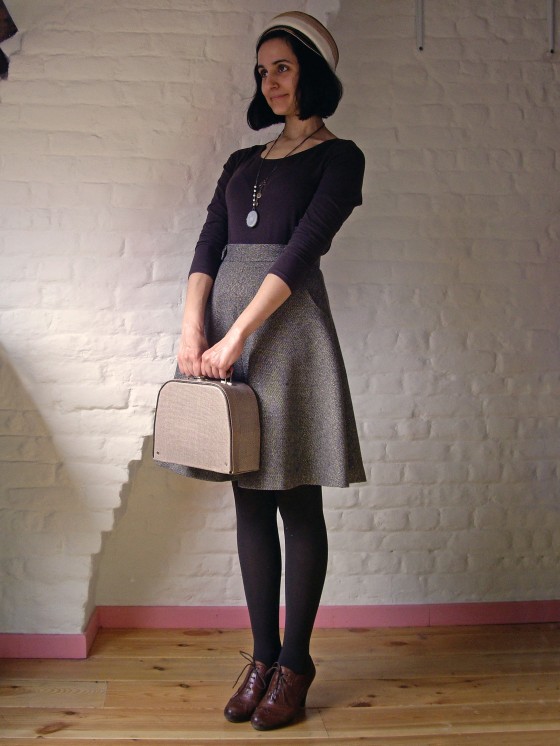
I finished this skirt two weeks ago and I’ve already been wearing it quite a lot since then. It’s the Hollyburn Skirt by Sewaholic, in a beige and brown tweed that has a golden thread woven in, though you can’t really see that on the pictures. I lined it with beige Venezia, following those instructions, and the buttons I chose are wood.

Peanut2

The fabric is quite thick, which was kind of a pain to work with when the time came to sew the button tabs, but all in all everything went smoothly, even tough because of the thickness you can sometimes see the bulk of the pockets through the skirt.

Peanut3

The pattern was very straightforward, so I really took my time and focussed on achieving a very clean finish: French seams (my first ones!) on the lining, handsewn hem, hand-picked zipper…

Peanut4

I wanted a classical skirt that wouldn’t be boring either (hence the golden speckles!), and I’m really happy with the result.

Also, a thing that is always very important to me in a garment is to be able to ride my bike comfortably when wearing it (I bike to work, and everywhere as a matter of fact!), and this skirt passes the test, yay!

Peanut5

PS Pirouette, Cacahuète is the title and chorus of a well-known French nursery rhyme with an allusion to golden thread. Plus “cacahuète” means “peanut” in French and my skirt is kind of the color of peanuts (well, the background is, I assure you!).