Pink Elephant

ElephantFaceI still haven’t finished my coat, so it’s official then, my first finished project of 2014 is a pink elephant! And it’s not even for me! Will you look at that face: how am I supposed to let it go?

Last Wednesday I was working on my coat and kind of loosing steam when I realised I had completely forgotten to either buy or make a gift for one of my best friends’ baby girl’s first birthday the next day. I thought no problem, I’ll use that cute elephant pattern I recently bought and I’ll be done in no time! Hahaha, how wrong was I?

ElephantProfilAfter spending the whole evening and Thursday morning working non-stop on the elephant, all I had were an empty body sans tail and an empty head sans eyes and ears. Turns out the pattern is cute for a reason: it uses a thousand pieces with darts and you have to clip/notch about a million curves! Nothing difficult really, but time consuming, oh yes!

Let me cut to the chase, I finished the elephant yesterday. Yep, it took me four days to make a stuffed elephant, I’m definitely not the world’s fastest sewer, if one still needed proof!
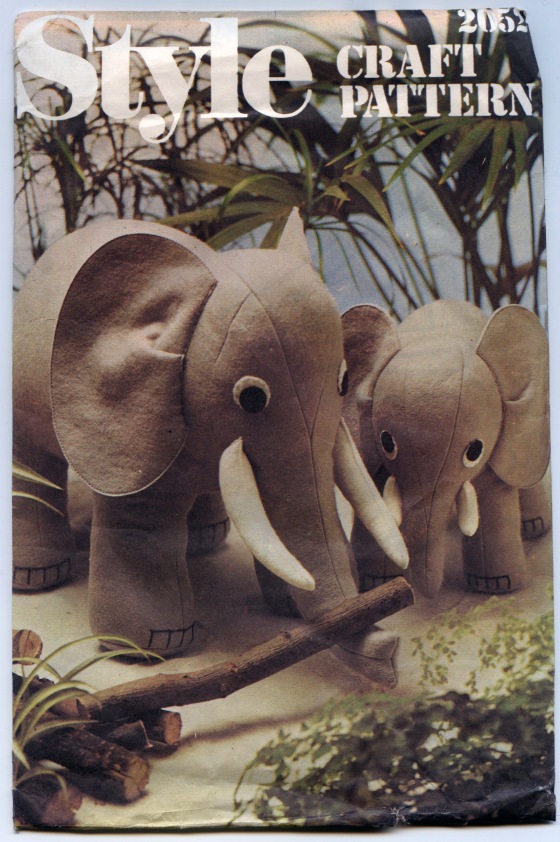
Style2052The pattern is Style Craft Pattern 2052, from 1979. There are two versions: adult and baby. I chose the adult, but I didn’t think to check the measurements of the finished elephant, so I was kind of surprised to see the size of the beast: 30 cm at shoulder height, 40 cm length without the trunk, oops! Ah well, I’m not the one who’s going to have to find a place for it in my apartment!

What I didn’t like in the pattern (except for the fact that they would have you baste most seams before stitching them – I didn’t and I had no problem whatsoever) was the fact that you have to hand stitch the tail, ears and tusks (as you can see, I chose to omit the tusks: the elephant looks way cuter for a baby without them) afterwards instead of sewing them into seams. The eyes are also supposed to be hand sewn afterwards, but I machine sewed them before attaching the head to the body. There are no seams where you add the ears, so there’s no other solution for them (and it’s possible to get a nice and secure result with invisible stitches, contrary to what the envelope picture would have you believe…), but if I ever sew that pattern again, I’ll be sure to sew the tail into the back seam: it will look better and be more secure.

Also, the sample is sewn in felt, so the tail and ears (and tusks) are sewn wrong sides together, with visible seams. Since I used corduroy (remnants from this skirt) and I didn’t want it to fray, I sewed the ears and tail with right sides together. This caused no problem for the ears, but for the tail I had to adjust its end so that I could turn it right side out.

Elephant3:4Stuffing the elephant was an adventure of its own. I bought a giant (and I mean GIANT, like 1 cubic metre!) bag of polyfil for a song at least seven years ago and although I had used some for a few projects, it must have been self-regenerating or something because all of my projects barely made a dent in it. But this time, the giant polyfil bag has found its master! The elephant literally ate most of it, leaving me with about a fifth of it, if not less. The pattern has you stuff it firmly, so you wouldn’t believe how much polyfil there is inside. And it was not an easy task getting it all in: it took me about an hour, sweating and short of breath, and my arms are still a bit sore.
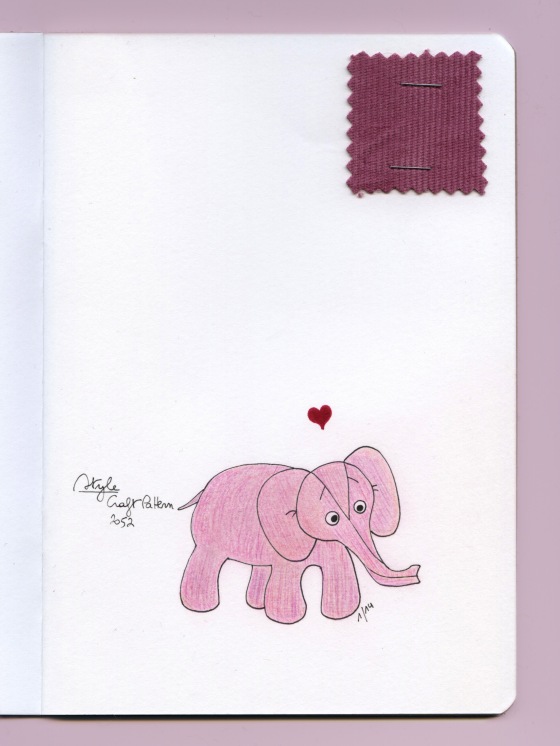
PinkElephantIt’s not easy drawing with a sore arm, but I didn’t want to abandon my resolution, so here’s the third page of my sketchbook! I normally draw before finishing a project, but the impromptu nature of this project made it impossible, so afterwards it had to be.

I’m really happy with the end result of the project, I’m not kidding when I say it’s going to be difficult to give it away! I really took my time (four days, you bet I did!) to get the best result I could and there are not many things I would change if I had to do it again. And I want to sew that pattern again, though I’ll take filling my wardrobe over adding to the clutter of my home any day, so it will have to wait for another special occasion.
Knitting: pompom Garland

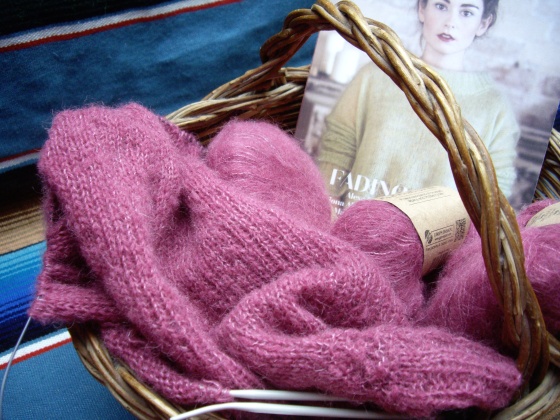
GarlandNo, I’m not knitting a pom pom garland, I’m knitting Garland, the beautiful sweater from the cover of the latest issue of pompom!

I’m using Drops Alpaca Silk, a mix of brushed alpaca and mulberry silk, in the colour Heather (#08). It’s been a really nice yarn to work with so far, and for a mohair like yarn, it’s also quite easy to unravel (ask me how I know!).

It’s been more than two months since I started working on the sweater and I’m finally reaching the end of the body. The sweater itself is really easy (a lot of stockinette in the round, with no increases and hardly any decreases), but the five rows of lace of the bottom gave me the hardest time! If you plan on knitting this sweater, I strongly recommend placing a stitch marker between every repeat of the lace pattern. Yes, that’s about forty stitch markers, one every seven stitches if I remember correctly, but if I had placed them from the beginning of the lace I would have saved myself a lot of tears, time and frustration! Only after frogging the lace rows for at least the fifth time did I place the markers, and even though I still had to frog the lace a few times, I don’t think I would have been able to complete it without them.

After spending so much time on so few rows, I had kind of lost the motivation to work on the sweater, which is why it’s been taking me so long. Also, after all my efforts, the lace looks weird: I don’t really see the cute flower motif I’m supposed to see there… I’m hoping this will change after blocking, especially since I’m quite sure I followed the chart correctly! Anyway, there was no way I was going to frog the lace AGAIN, even if I did mess something up!

And one row here, one row there, the body is almost finished, which gives me a new motivation! Though I kind of fear the beginning of the sleeves, which feature the dreaded lace pattern again!

Sketchbook: Grey Babydoll Coat

BabydollCoatHere’s what I’m working on at the moment: a grey babydoll coat! It’s been taking me a lot of time, especially since I have only been able to work on it in small chunks of time here and there.

The pattern is BurdaStyle 01/2011 Babydoll Coat #118 (from the French version of the magazine). It’s a pattern in petite sizes, which I thought meant a 1,64 m height, so I thought no big deal since I’m 1,68 m, but it actually means a 1,60 m height. Of course I realised this after cutting everything, oops! Well, let’s just hope it doesn’t turn out unwearably too short.

The only thing I did lenghten were the 3/4 sleeves, because I personally need long sleeves on a winter coat (how novel of me!). I’m also planning on changing the required 2 sew-on snap fasteners into 4 functioning bound buttonholes, which will be my first ever bound buttonholes!

The fabric is dark grey 100% wool and the lining is grey polyester with pink polka dots! I’m planning on using the remnants to make a matching beret from a vintage pattern (McCall’s 9448). That is, if there are any remnants to speak of after I perfect my bound buttonhole technique!

Stash Diet: 2014

Stash-Diet-BadgeWhen I mentioned in my end-of-the-year roundup post that I wanted to stop amassing fabric, Andrea of Stitch Parade was kind enough to let me know that she and her friend Gail of Today’s Agenda were hosting a challenge called Stash Diet: 2014 whose aim is, as is pretty clear by the name, to buy less fabric and use fabric from your stash instead.

I immediately jumped at the chance and joined Stash Diet: 2014 as I felt sharing with more people in the same situation would be of great help in attaining my goal. Everyone has to lay down their own rules, so here are mine, well here is mine, which is pretty simple:

I am allowed to buy one piece of fabric every five projects that use fabric from my stash.

This excludes: lining, interfacing and other notions needed for the projects. If a project absolutely requires a contrast fabric of some sort, I can buy said contrast fabric, but only on a project-by-project basis. This means I can’t buy it unless I’m starting the project right away.

Of course, I don’t have to buy a piece of fabric every five projects. If I don’t buy a piece of fabric after five projects, this means I can buy two pieces after ten projects, three pieces after fifteen projects, and so on… (yeah, like I’m gonna be strong enough to wait for so long before getting my fix!).

By the way, you may have noticed I didn’t mention anything about patterns. I’m focussing on fabric, and not patterns, because I’m still in denial of my pattern addiction I don’t think my pattern stash is problematic (yet) as all of my patterns (excluding books and magazines of course) still fit in two shoeboxes. Though I must admit I haven’t used most of those patterns yet.

Now, regarding the fabric, it may seem like having to wait for five finished projects before being allowed to buy one piece of fabric is quite strict, but let me just tell you about the extent of the damage…

My friend Mimolette and I recently decided, in accordance with our resolution to use fabric from our stash, to organise our stash in a way that made it easier for us to know exactly which fabrics and how much fabric we owned. I personally stash my fabric in plastic boxes I store in this very weird 1,60 m deep / 0,75 m wide / 1,20 m high under-the-rafters cupboard, so it’s not easy checking how much yardage I own of a particular fabric, or how two pieces of fabric would match, and so on. So we thought it would be really neat to cut a swatch of each fabric and paste them in a notebook with information such as yardage, composition, place of purchase, planned project(s)… And so we went to work.

SwatchAlbum

“It is a crag! … a peak! … a promontory! … A promontory, did I say? … It is a peninsula!”

I decided to use Bristol board cards and to place them in a photo album. Very soon I realised the pocket-sized album I had bought was way too small to contain all the cards I had already completed, so I bought a much bigger one, which allowed me to place all of my cards once I had completed them. Then I counted the cards. I’m kind of ashamed, to say the least. Do you want to know how much fabric I own? Okay, I’m just gonna say it: I own exactly 160 pieces of fabric. 160. One hundred and sixty.

I can’t believe it. How did I buy and not use 160 pieces of fabric? My name is Tassadit and I’m a fabricaholic. One piece of fabric every five projects doesn’t seem so strict anymore, does it? I should even stop buying fabric altogether, shouldn’t I?

More seriously, even though counting my fabric was scary, I’m really glad I did it because it not only truly helped me gain some perspective on the extent of my stash, but it also simply reminded me which fabrics I own, which will make it easier for me to reach for them instead of buying some more for my future projects. And with my fabric swatch album, I feel like I can browse the catalog of a shop that would sell only fabric I love, for free, with instant delivery! This will be the greatest tool in this challenge!

SwatchPage

I haven’t filled in the pattern suggestions yet, but I did take the time to classify the swatches first by weight, then by colour and theme!

Are any of you participating in the Stash Diet: 2014 initiative or any other similar challenge? And, more importantly, does anyone own 160 pieces of fabric or, even better, more than 160 pieces of fabric?

Camper Tee

Camper1Pretty close, huh?

This isn’t my first project of 2014, but my last project of 2013, which I finished ten days ago, but couldn’t find the time to photograph in between holiday activities. You may have seen the sneak peek I posted at the end of the picture overview of my projects of 2013.

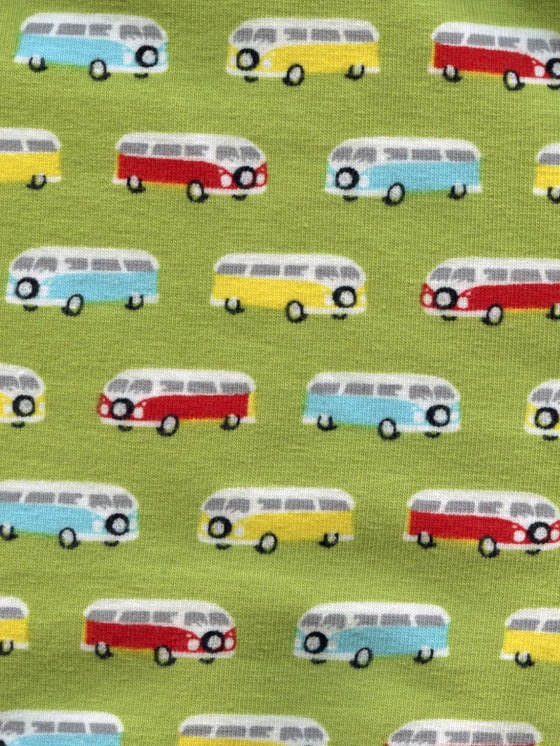
CamperFabricThe fabric is this adorable cotton jersey knit with a retro VW Camper print from de Stoffenkamer (not available anymore, I’m afraid). It was quite nice to work with in that the edges didn’t tend to curl and it was pretty stable, yet I almost lost my mind when cutting because the print was a smidge off grain, which made it impossible to both place the pattern pieces on grain and keep the campers horizontal. I chose to keep the campers horizontal because it really jumped out at me otherwise, yet I was afraid it would cause the tee to hang funny. But it’s actually subtle enough that it looks totally okay, phew!

Camper2With everything going on, I didn’t even try matching the pattern at the side seams of course, but I don’t think it’s obvious at all on the finished tee.

The pattern is Sewaholic’s Renfrew, which I cut in a size 4, one size smaller than my measurements, because I wanted it to be closer fitting, and I’m really happy with the fit. I omitted the hem band (stitched the hem with a double needle) and I cut my own neck and sleeve bands, in off-white cotton ribbing. The sleeve bands provided in the pattern were too wide for my taste, and the neck band seemed so hugely long I don’t know that it would have sat properly.

Camper3Other than that I made no modifications, that’s the joy of working with knits! Also, this was my first time using my new serger and I must say, even though it’s definitely not indispensable to sew knits, it still makes for a much cleaner finish.Camper4In any case, I can see myself wearing this tee a lot as I think it will look very cute tucked in my Hollyburn, Beignet and Chardon skirts. And I’m pretty sure that this is won’t be my last time using the Renfrew pattern!